Nota: Este contenido está disponible actualmente solo en alemán e inglés. Puede utilizar la función de traducción integrada de su navegador para ver la página en su idioma preferido. Las instrucciones están disponibles para Google Chrome, Microsoft Edge o Mozilla Firefox.
Inhalt:
Take a screenshot of the smartphone as an Image and edit, share and send it.
Taking a screenshot:
1. Open the screen for which you want to create a screenshot.
2. On Gigaset smartphones that have a function key, you can create a screenshot by pressing this key.
3. Press and hold the On/Off button and select screenshot.

or press the On/Off and Volume buttons at the bottom at the same time.
Furthermore, you also have the option to take a screenshot by swiping with three fingers from the upper area of the display to the lower area of the display:
| Android 13 | Android 14 | Android 15 |
| 1. Open the settings | 1. Open the settings | 1. Open the settings |
2. "Intelligent assistance" | 2. "System"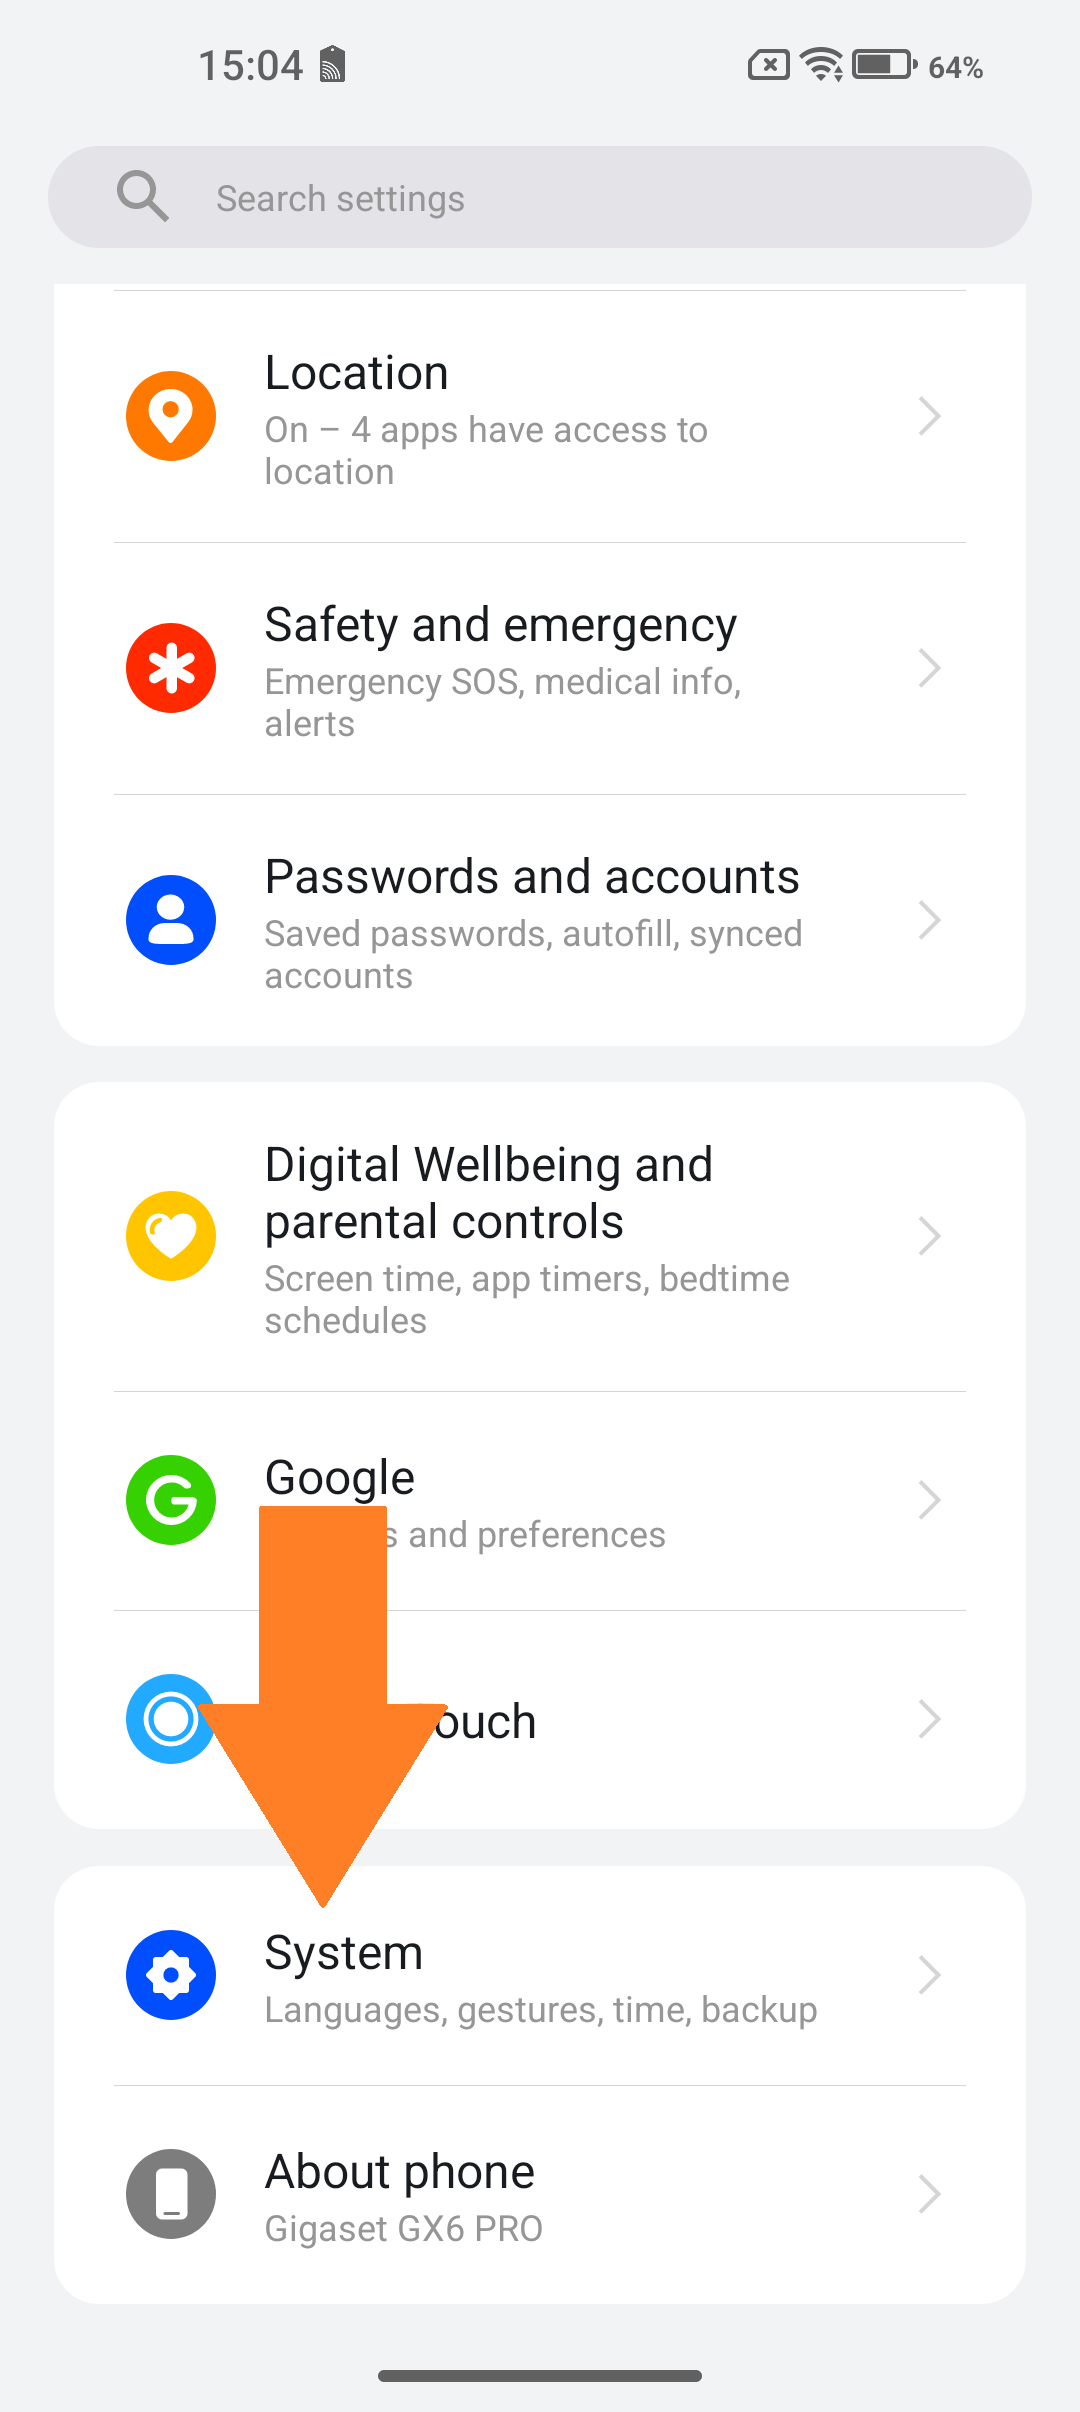 | 2. "Intelligent assistance"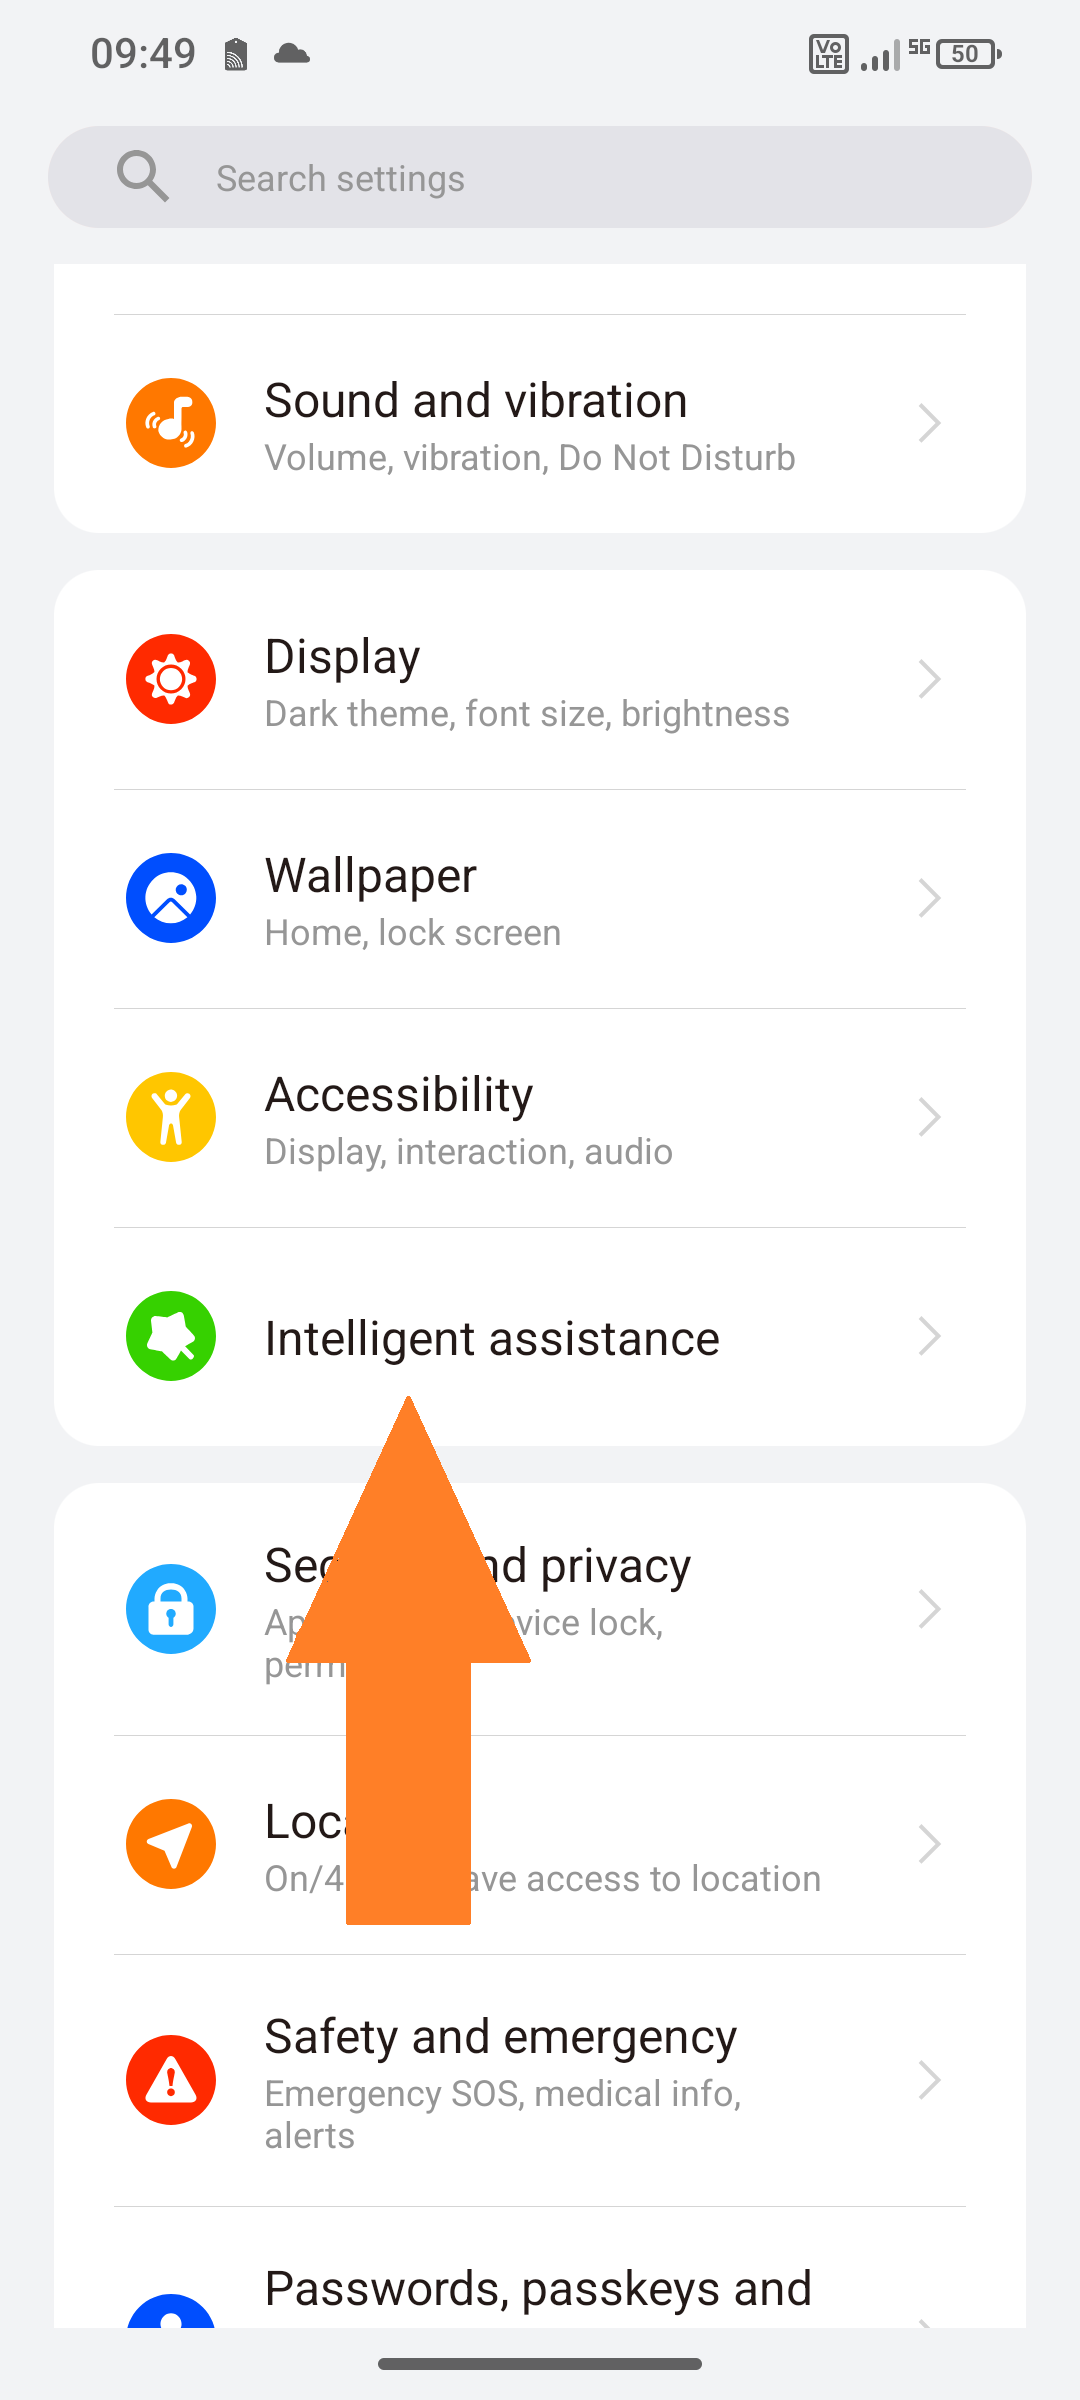 |
3. "Three finger screenshot" | 3. "Gestures"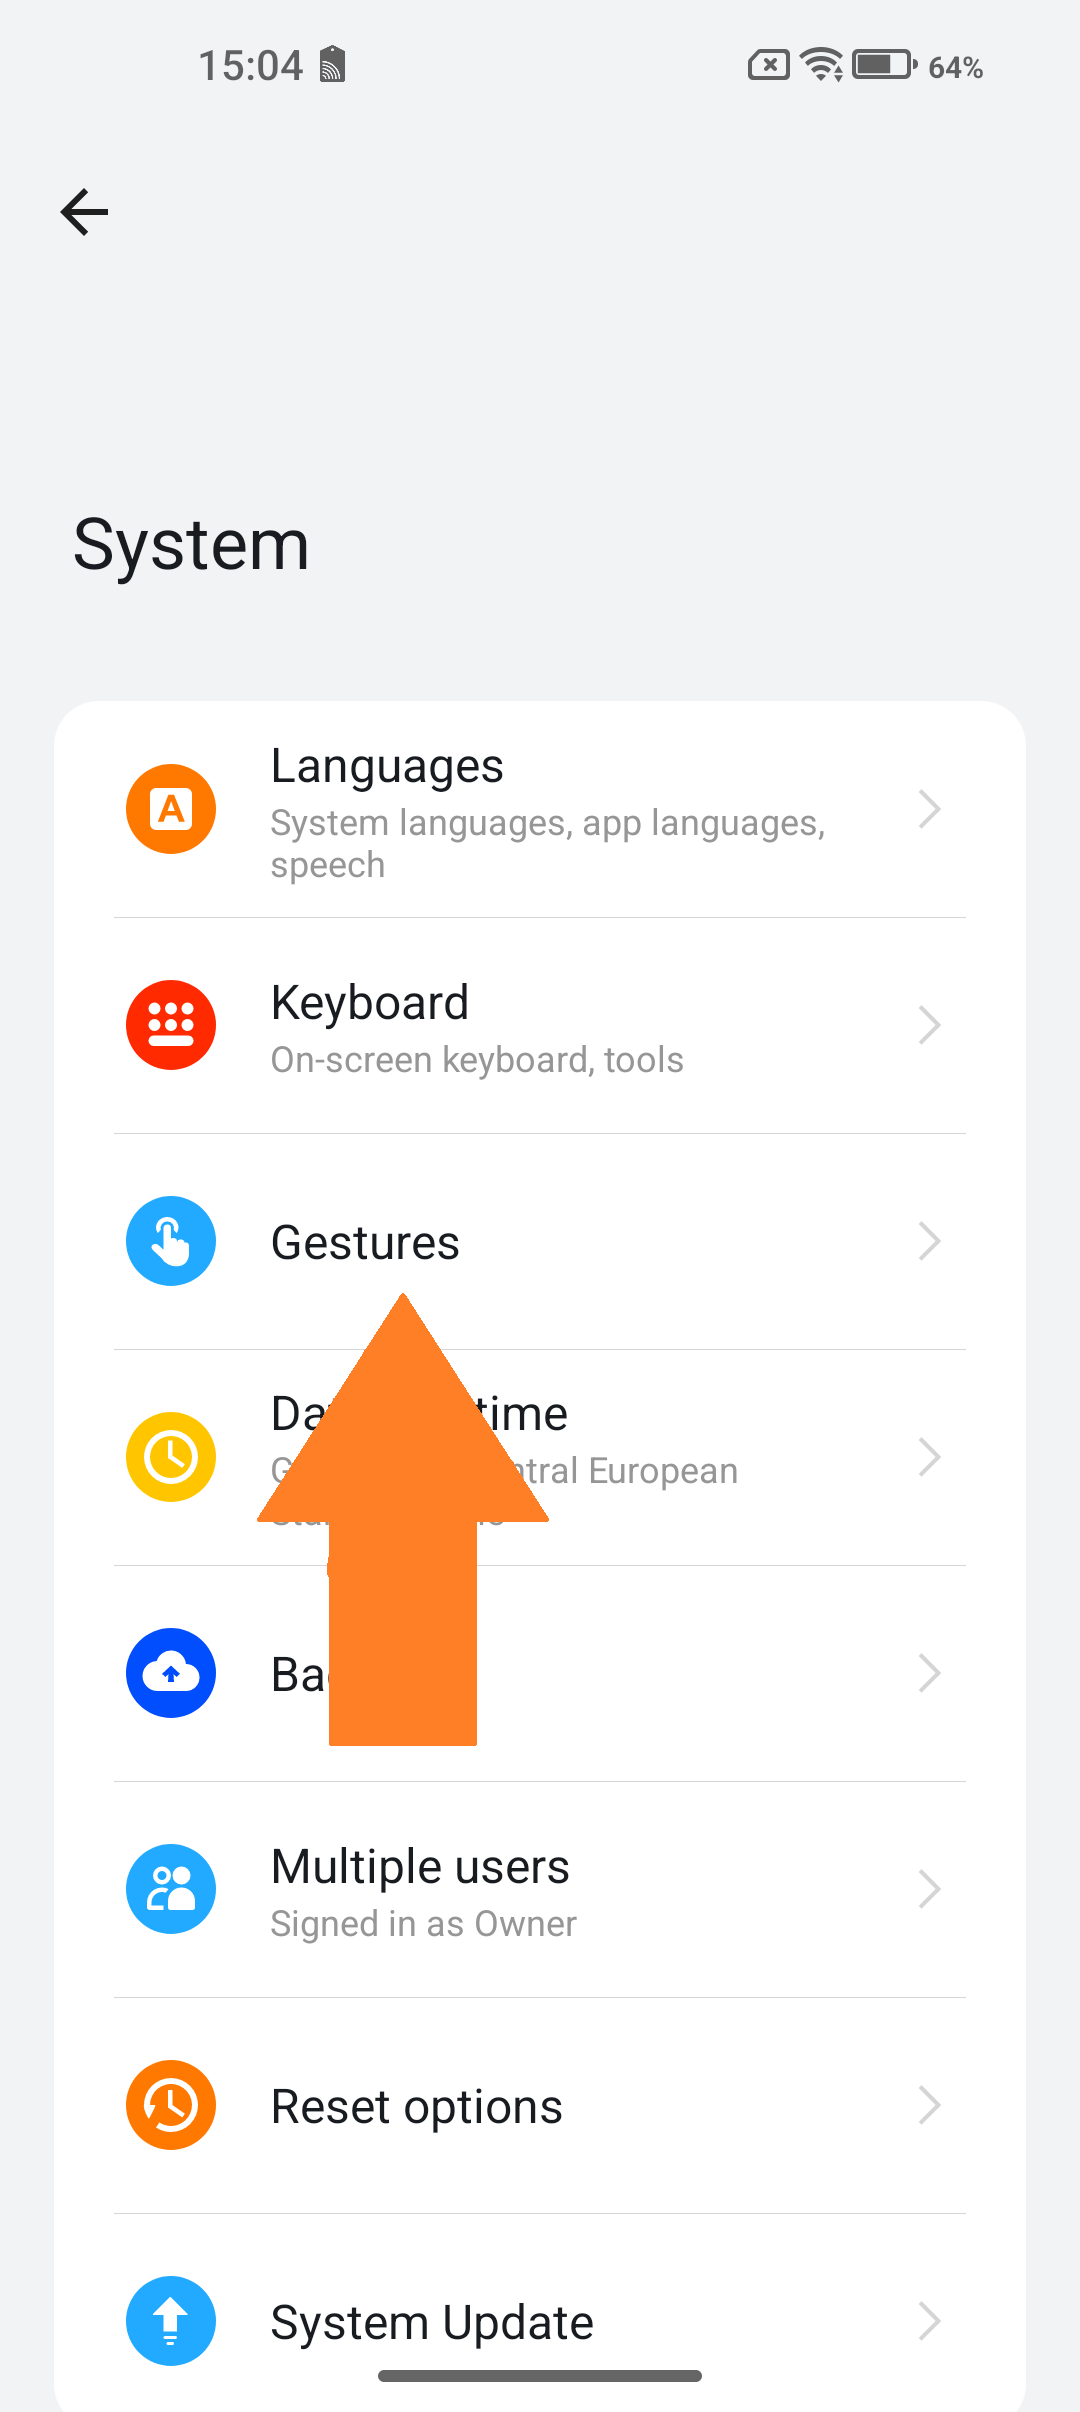 | 3. "Three finger screenshot"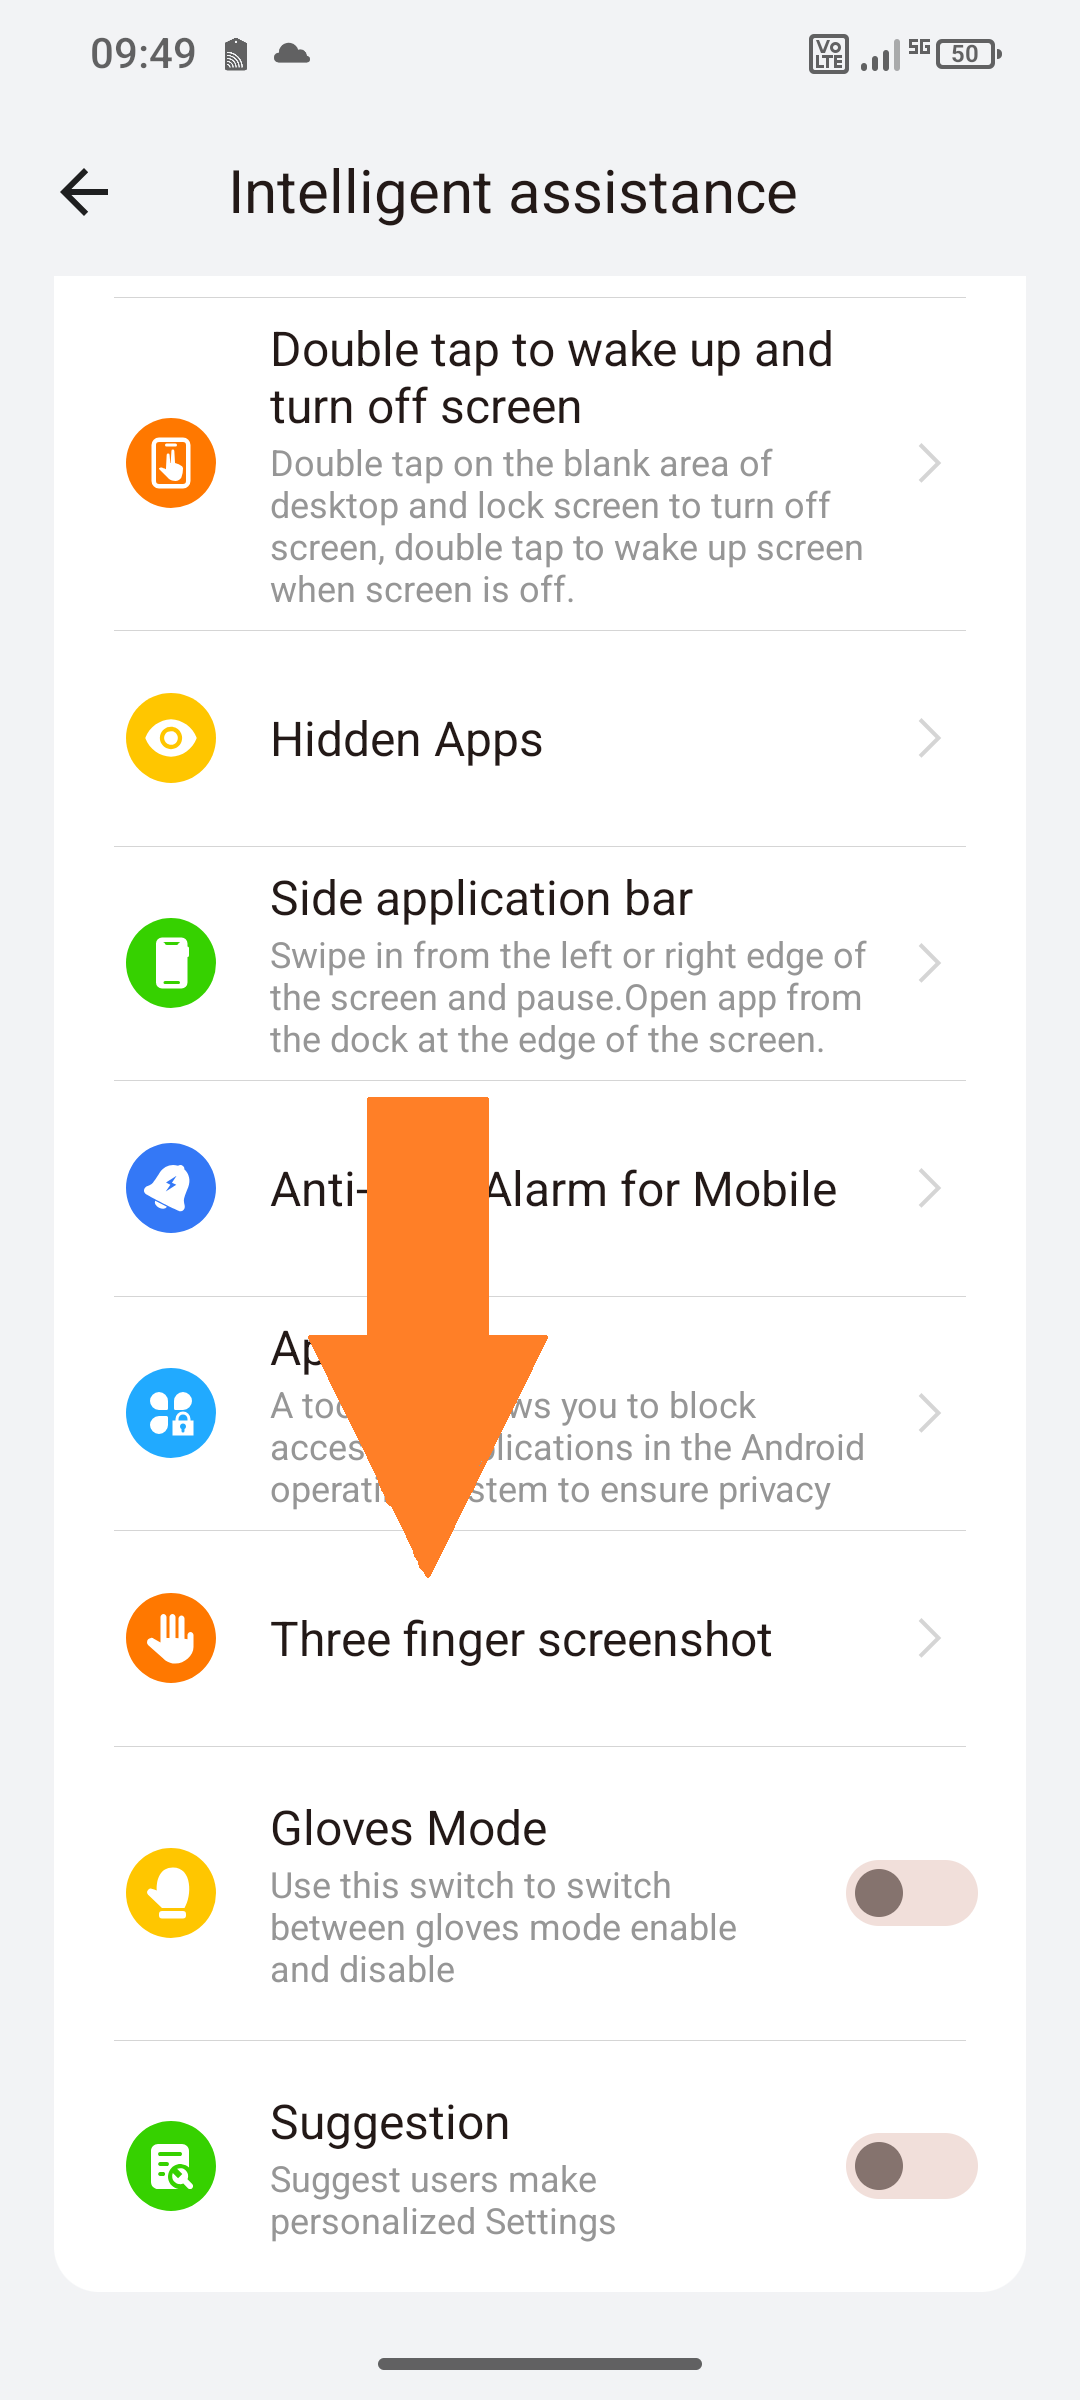 |
4. "Three finger screenshot"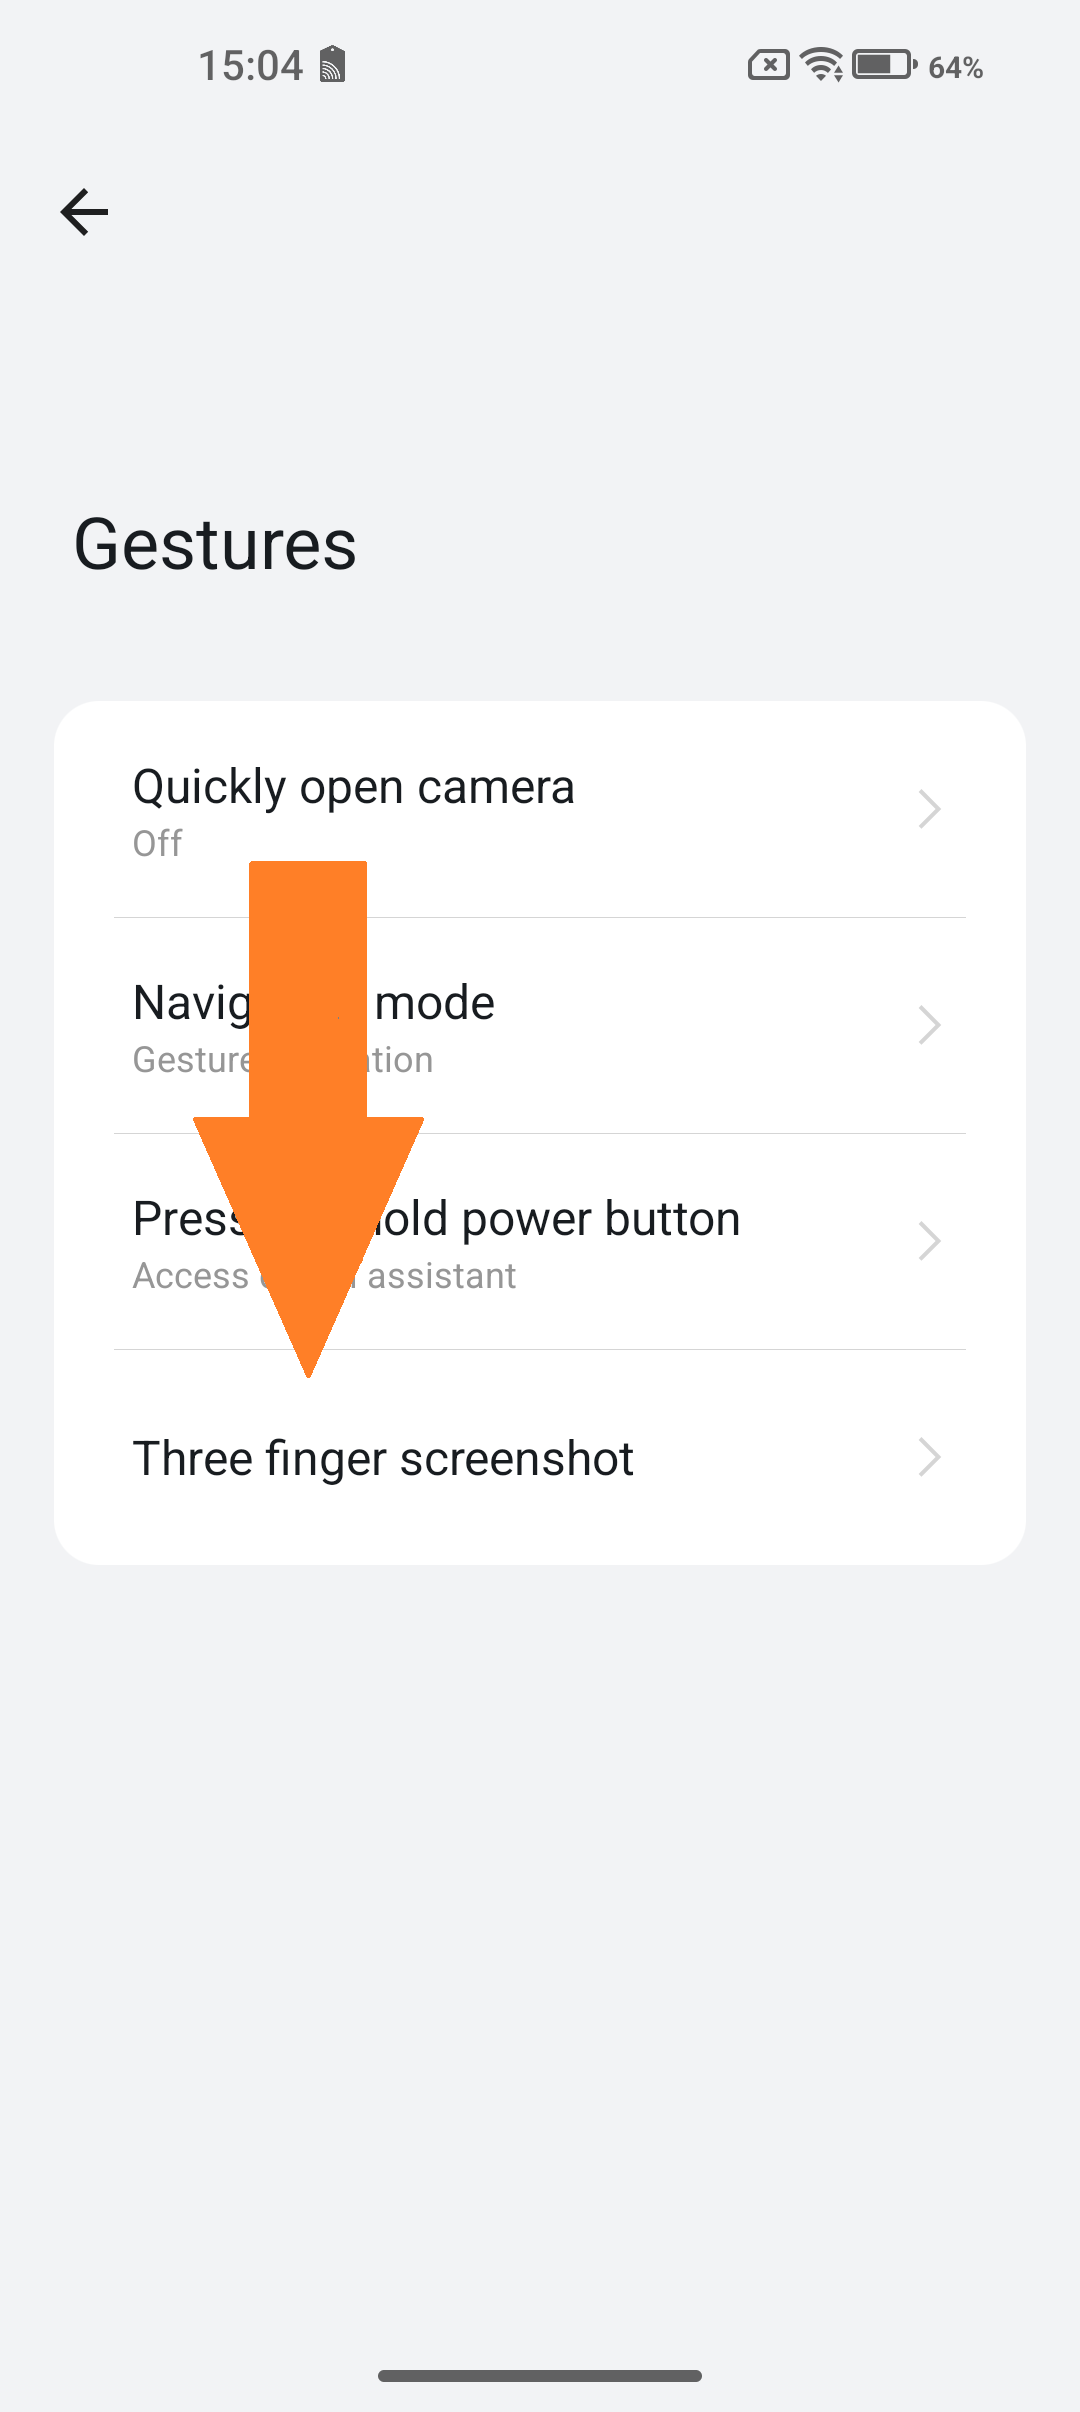 | 4. Do your settings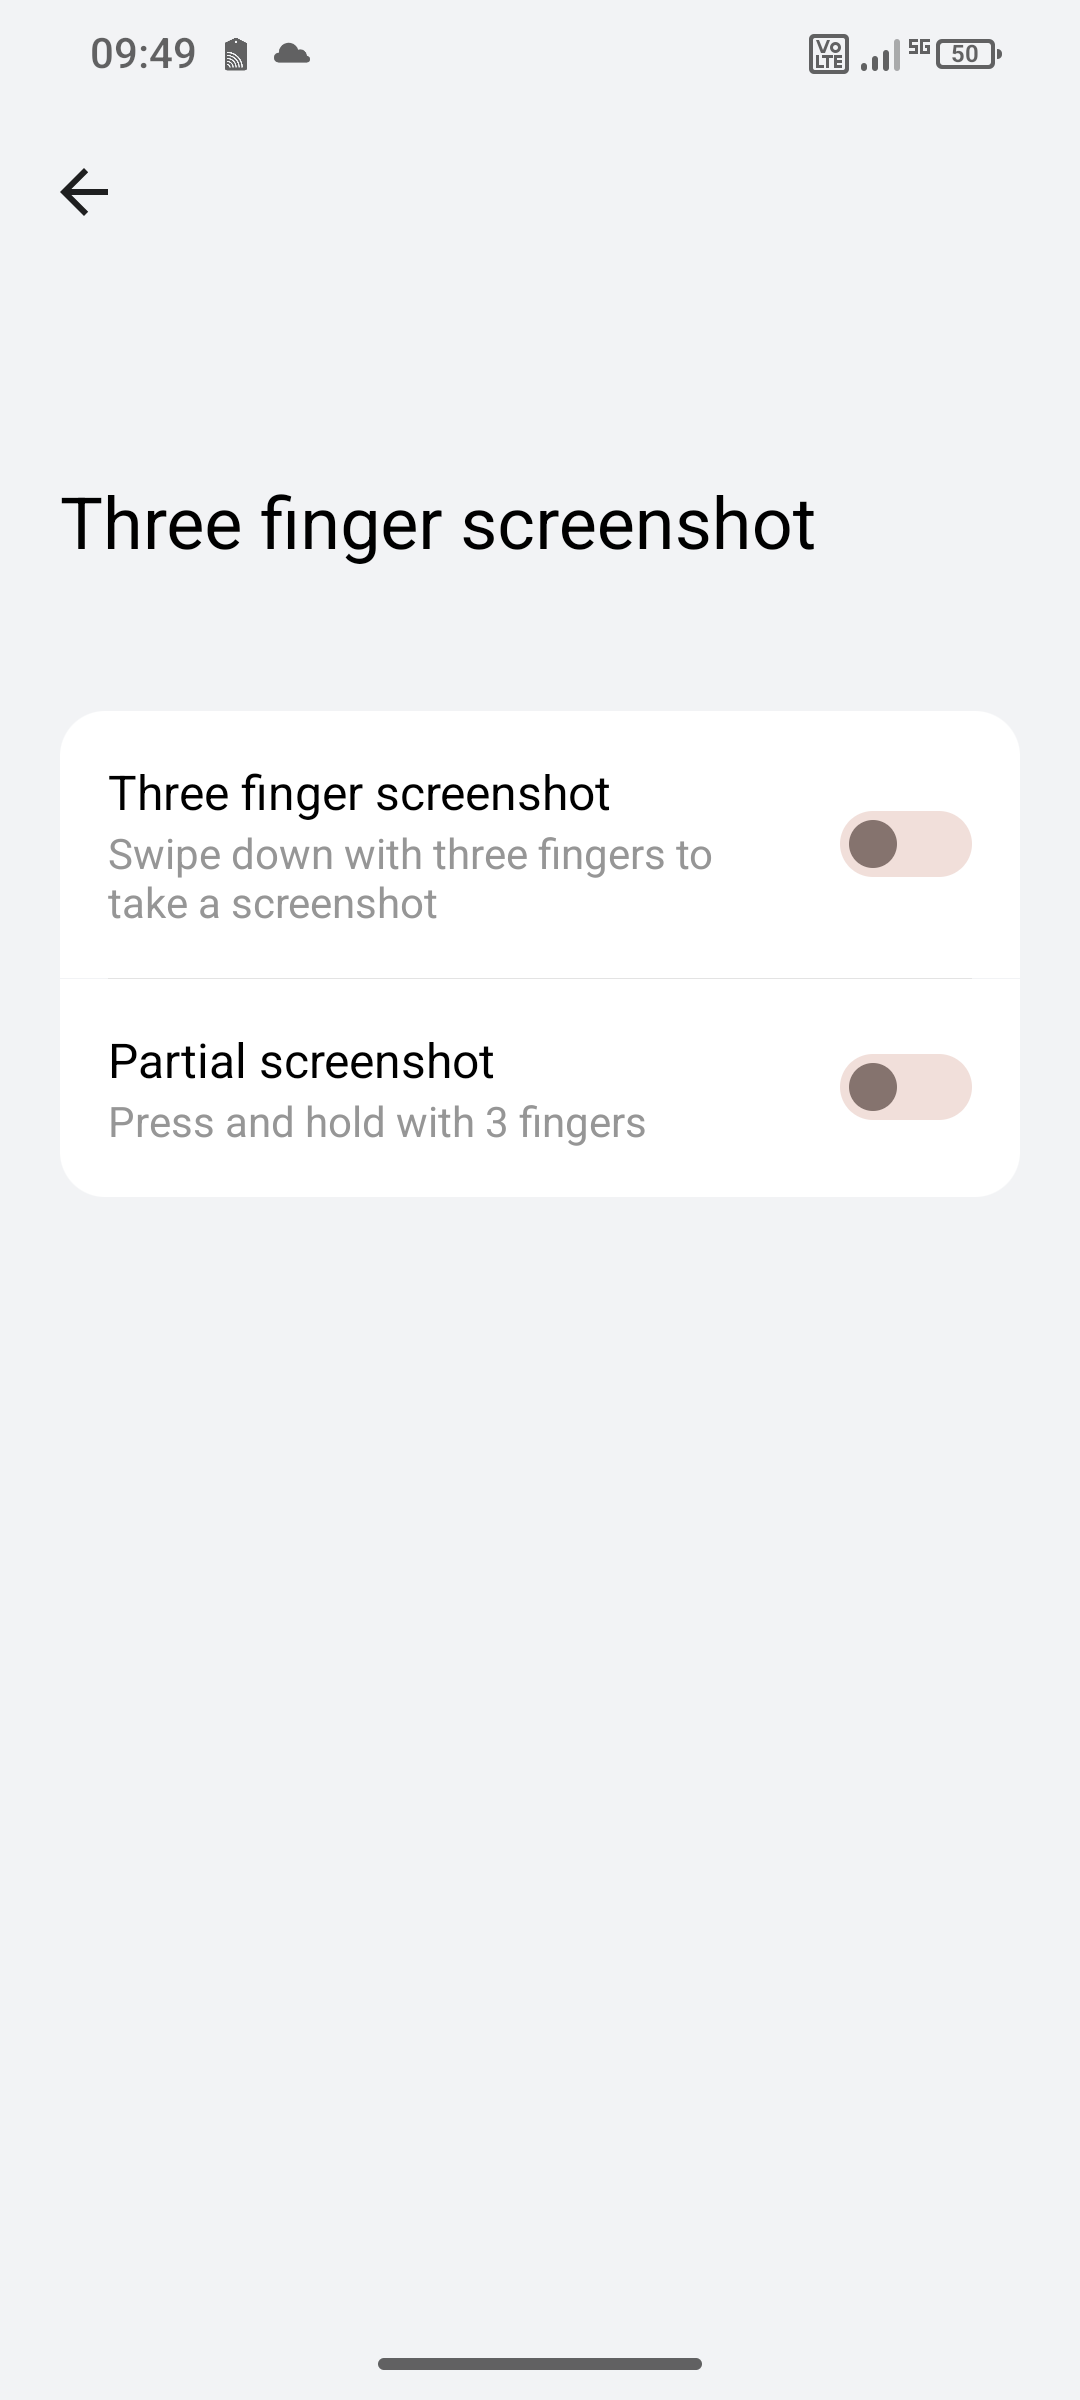 |
5. Do your settings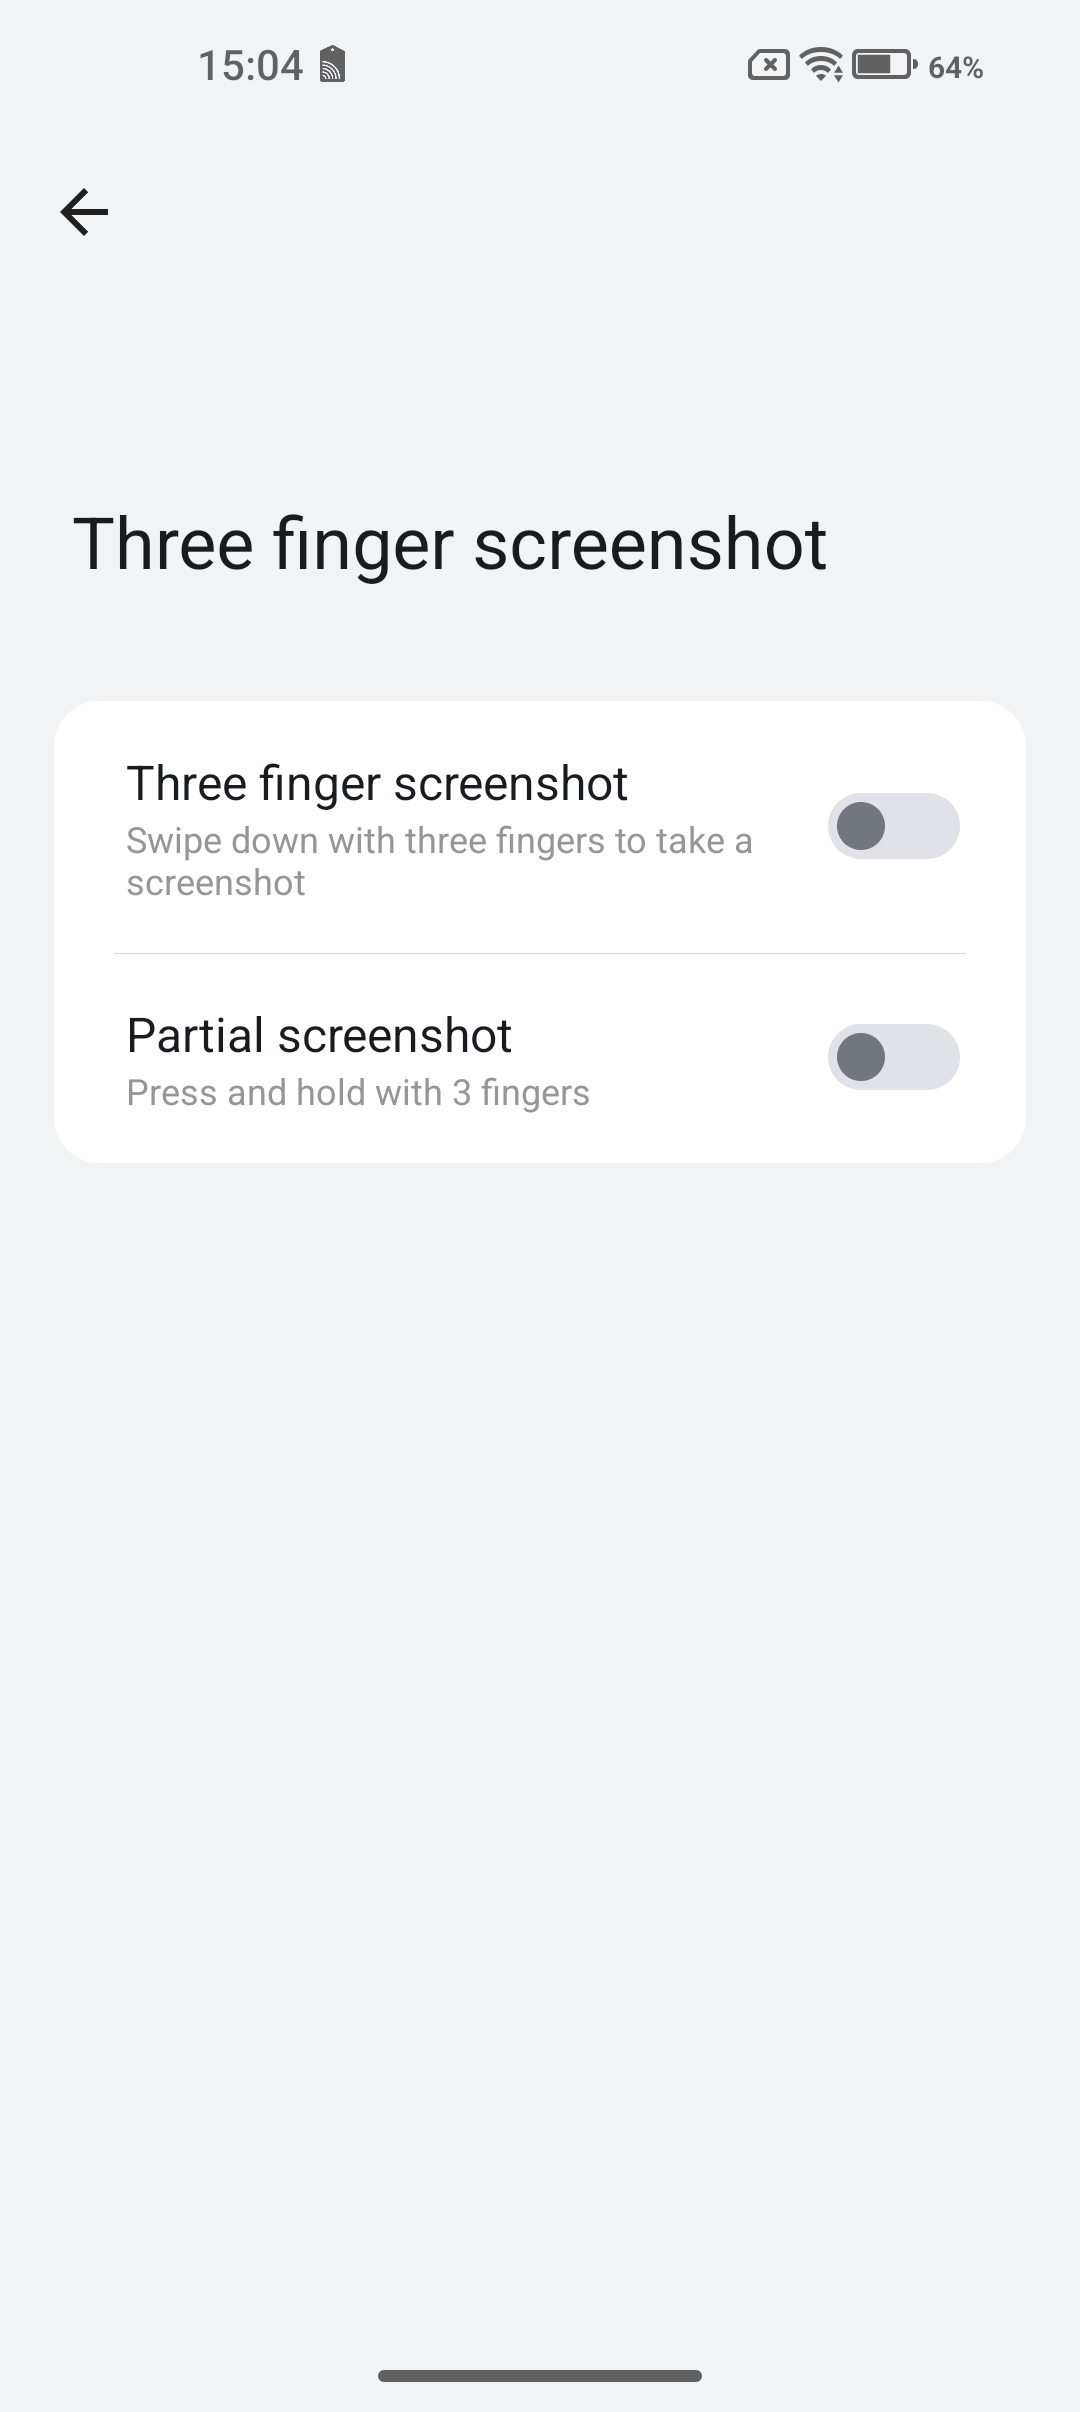 |
Super Screenshot:
The Super Screenshot is an app pre-installed by Gigaset that offers many different functions for screen capture of the display.
Where you can find the Super Screenshot app:
Android 13/14/15 |
1. Swipe 2x from the upper area of the display downwards |
2. There you can open the Super Screenshot app |
3. If you can't find the Super Screenshot app, click the highlighted button. |
4. Press and hold the "Super Screen" tile and drag it upwards. |
Functions of the Super Screenshot app:
1. Move:
Android 13/14/15 |
| 1. Open the Super Screenshot app |
2. Tap and hold the "Move" button. Then you can place the function menu at any position. |
2. Funny:
| Android 13/14/15 |
| Explanation: This gives you the possibility to customize your screenshot. You can adjust the actually usual rectangular shape of the screenshot as you like. |
| 1. Open the Super Screenshot app |
2. Tap the "Funny" button |
3. Here you have different functions to create a screenshot with any form |
3. Long:
| Android 13/14/15 |
| 1. Open the Super Screenshot app |
2. Tap on the "Long" button |
3. Tap the highlighted button |
4. Here you can select the area for the screenshot, edit it and finally safe it. |
4. Screen Recording:
| Android 13 | Android 14/15 |
| Explanation: Here you have the possibility to record a video from your screen. | |
1. Tap on the "Screen recording" button | 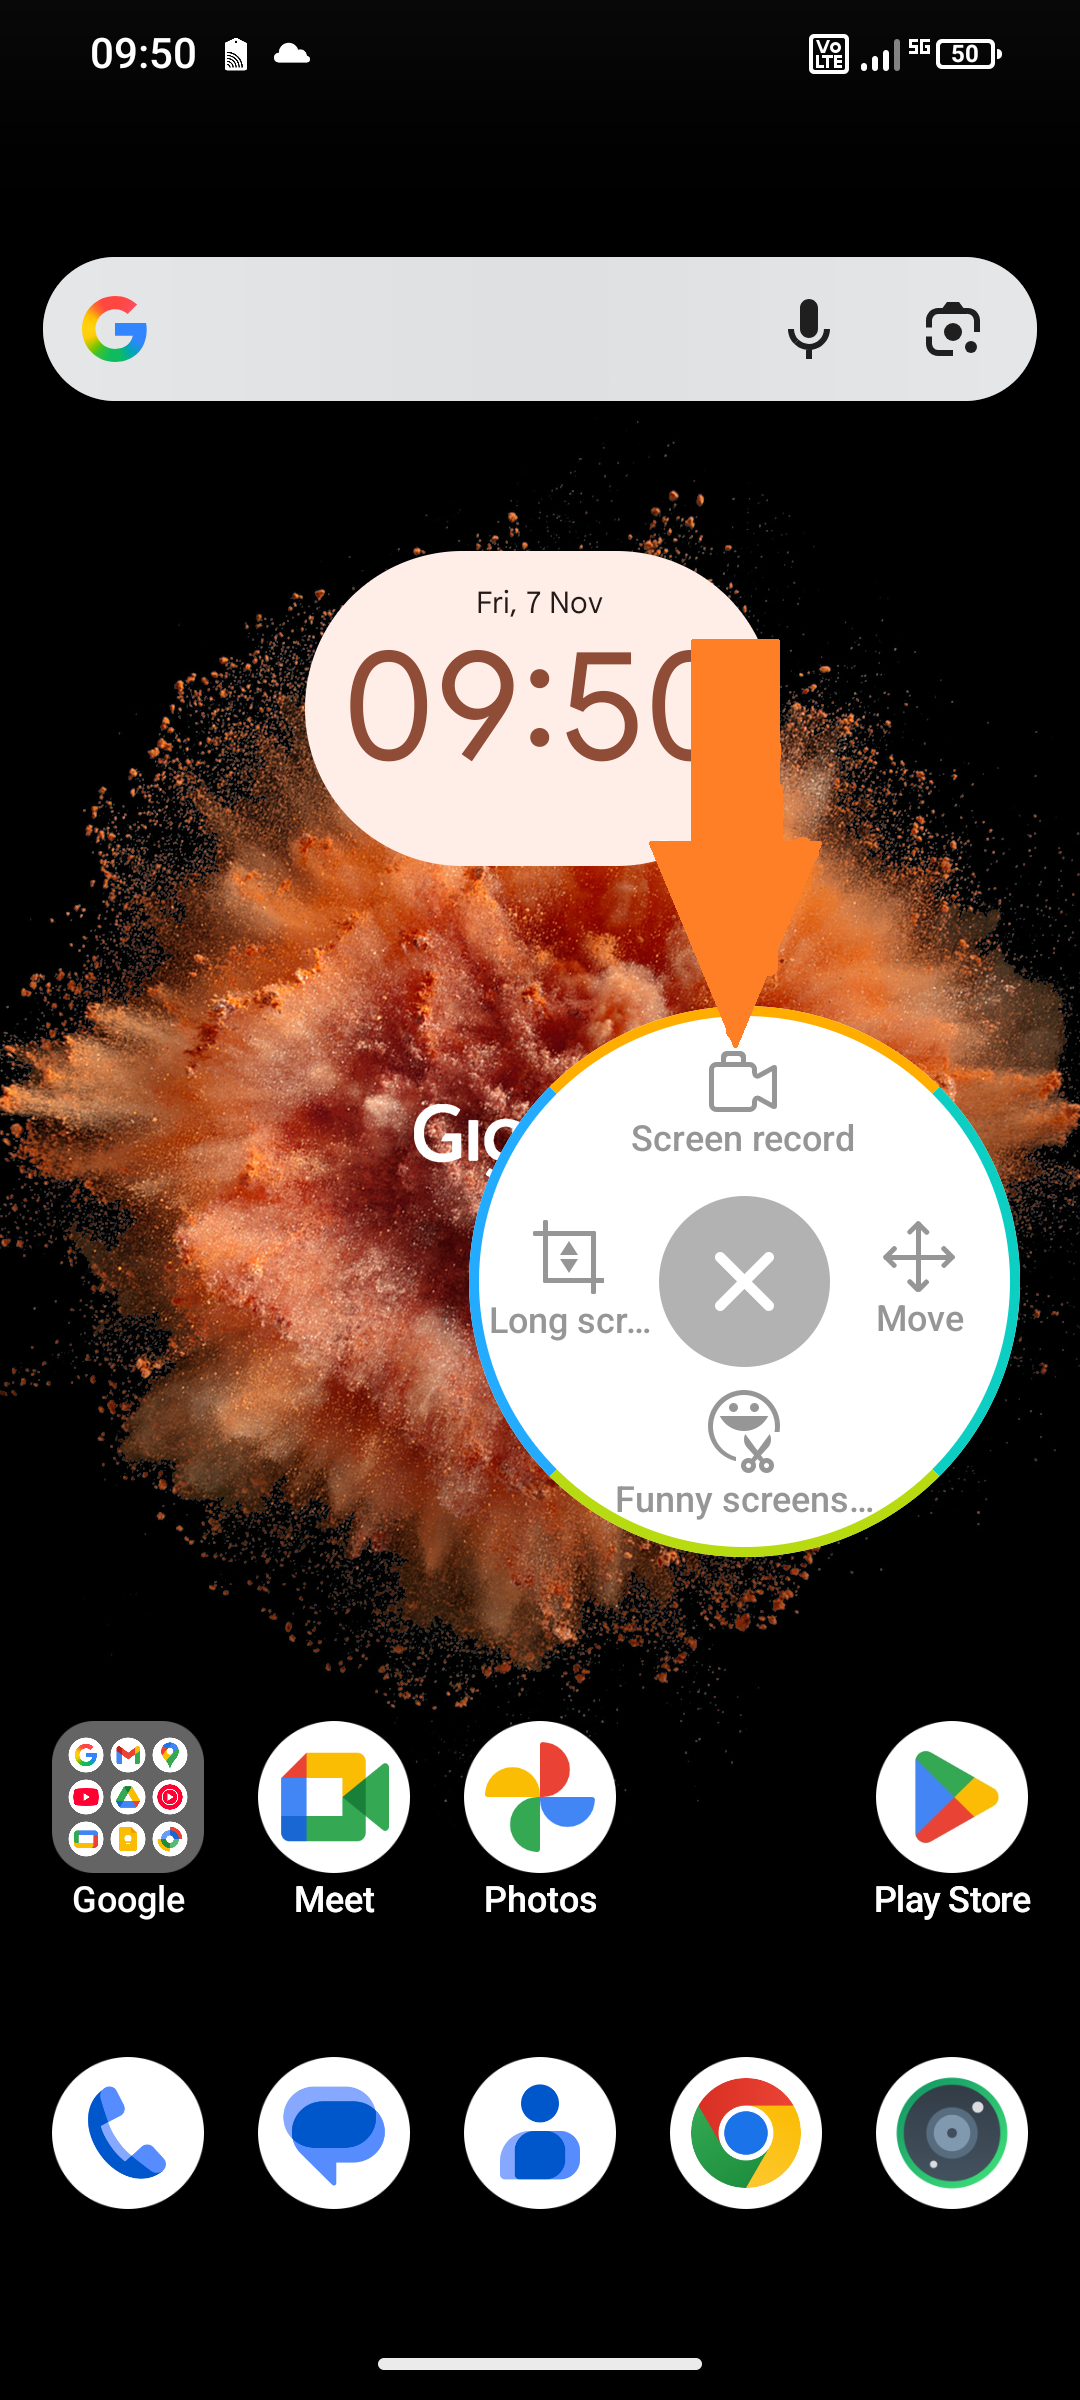 |
2. Tap the highlighted button to start recording | 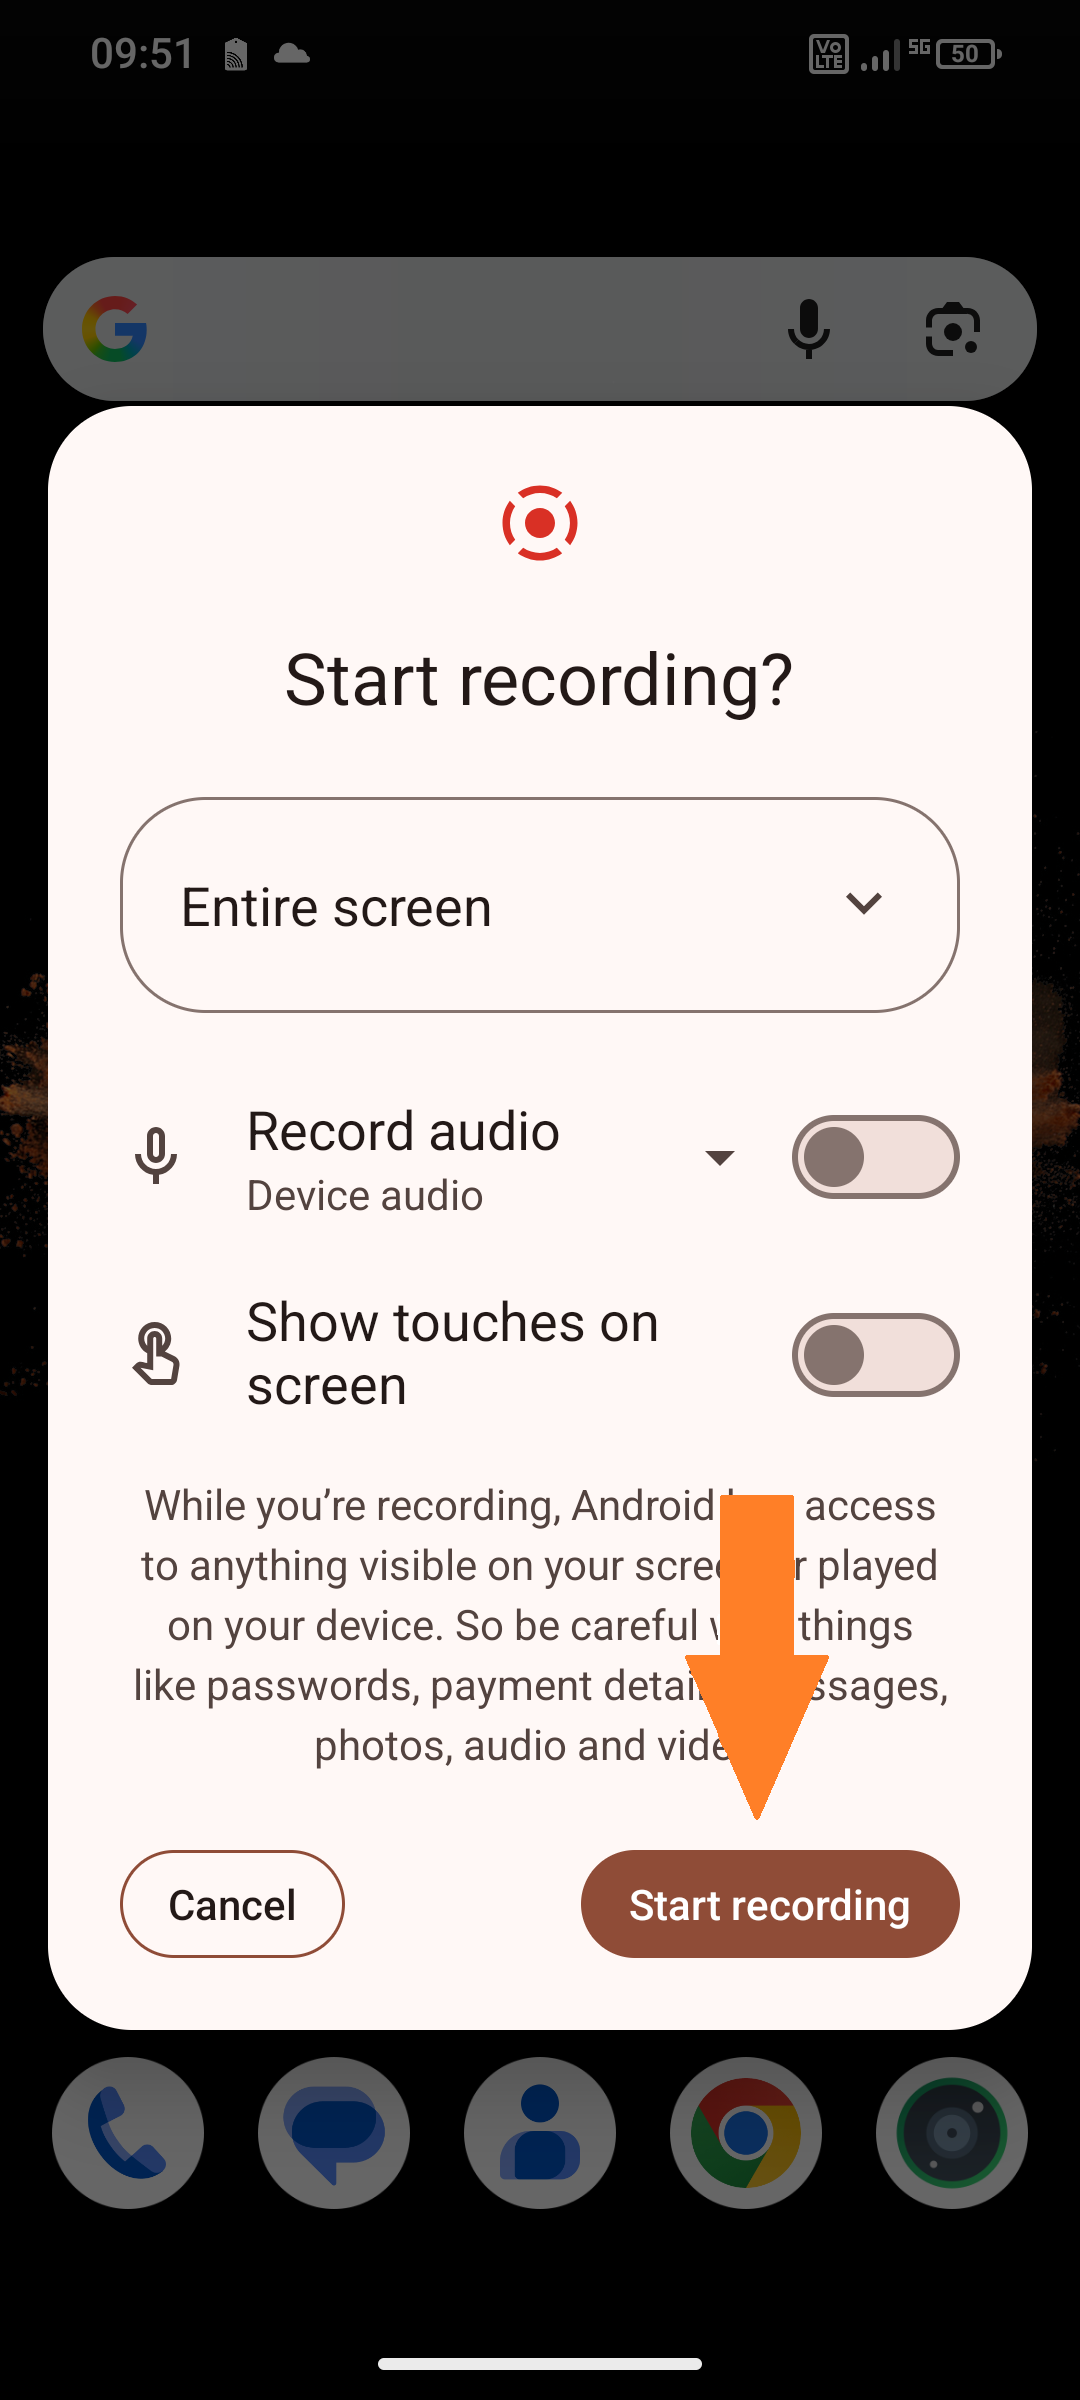 |
3. This is where you can see the recording on your home screen.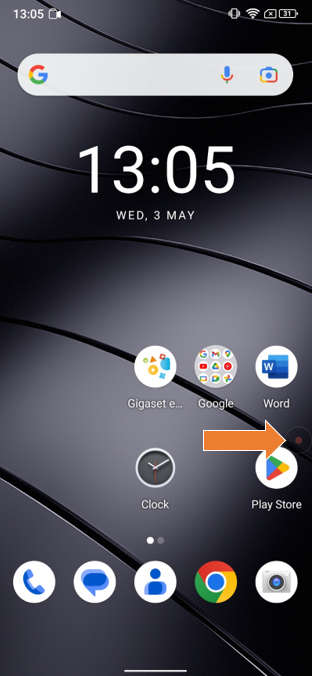 | 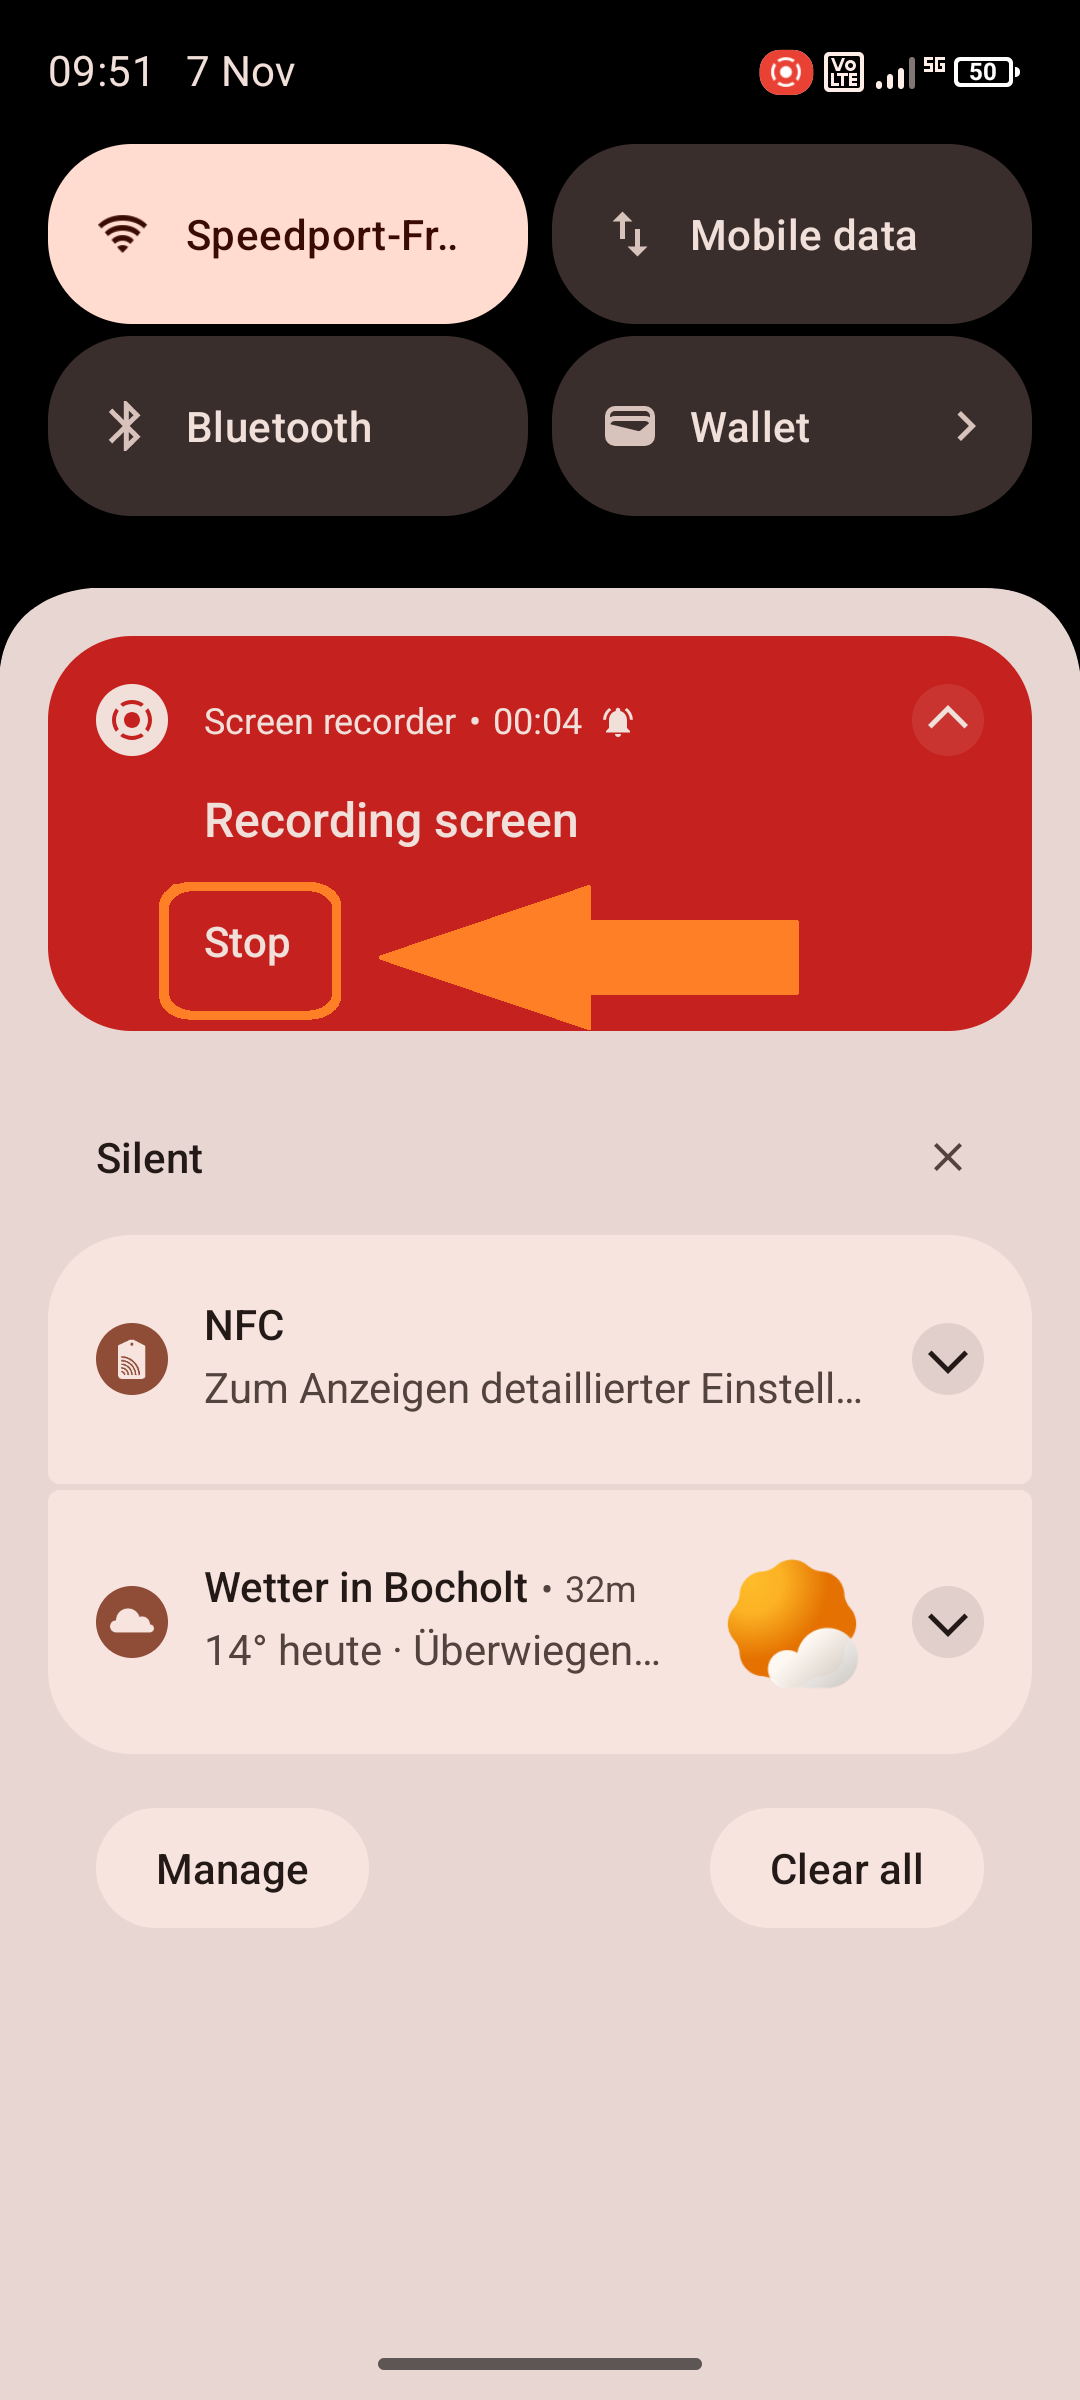 |
4. If you want to end the recording, tap the highlighted buttons. |
¿Le ha sido útil este artículo?
¡Qué bien!
Gracias por sus comentarios
¡Sentimos mucho no haber sido de ayuda!
Gracias por sus comentarios
Sus comentarios se han enviado
Agradecemos su esfuerzo e intentaremos corregir el artículo