Inhalt:
Take a screenshot of the smartphone as an Image and edit, share and send it.
Taking a screenshot:
1. Open the screen for which you want to create a screenshot.
2. On Gigaset smartphones that have a function key, you can create a screenshot by pressing this key.
3. Press and hold the On/Off button and select screenshot.

or press the On/Off and Volume buttons at the bottom at the same time.
Furthermore, you also have the option to take a screenshot by swiping with three fingers from the upper area of the display to the lower area of the display:
| Android 13 | Android 14 | Android 15 |
| 1. Open the settings | 1. Open the settings | 1. Open the settings |
2. "Intelligent assistance" | 2. "System"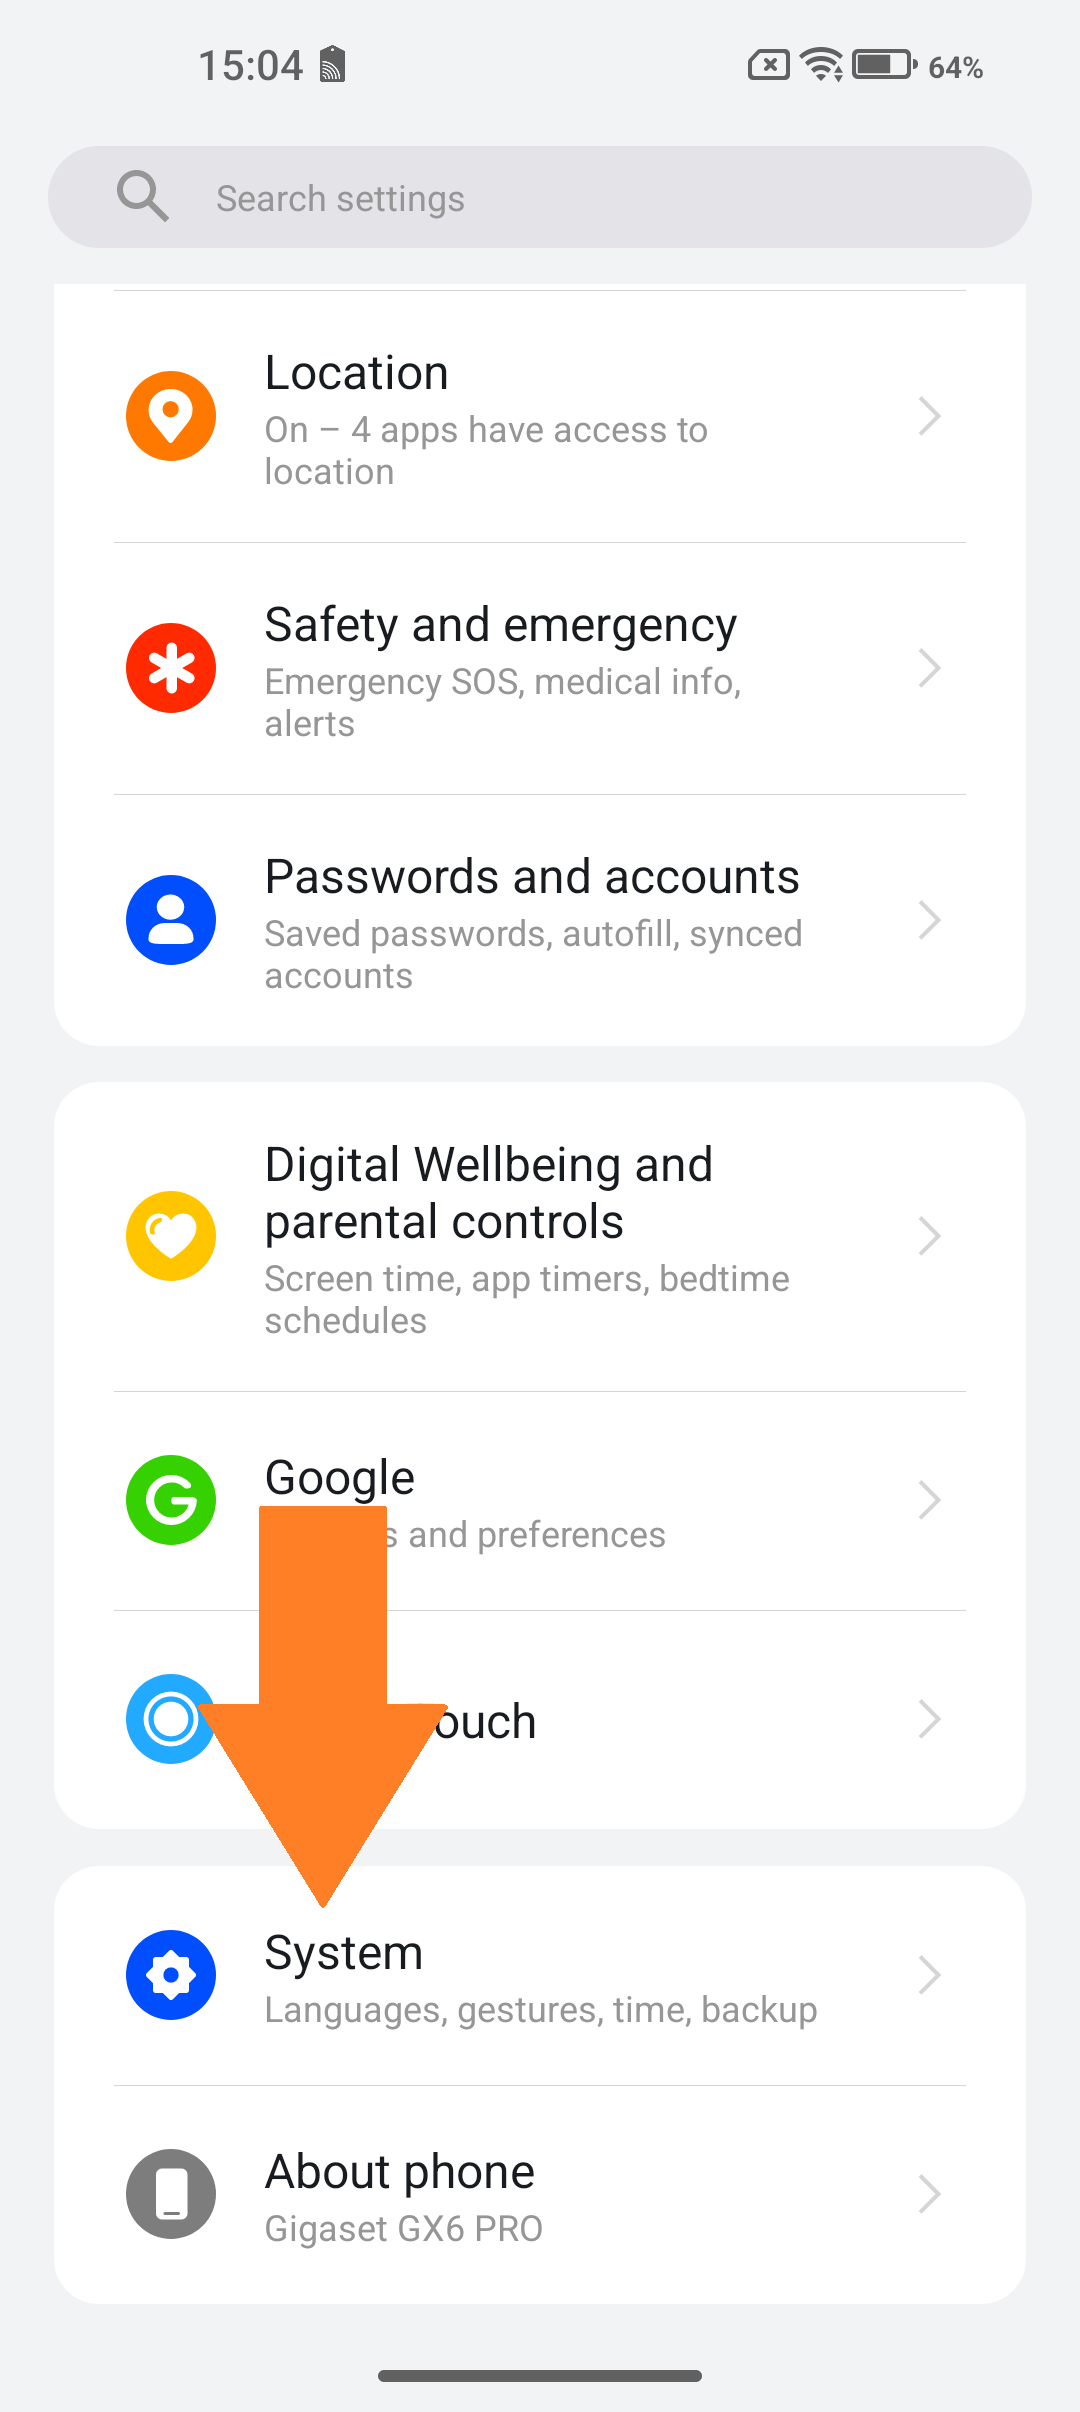 | 2. "Intelligent assistance"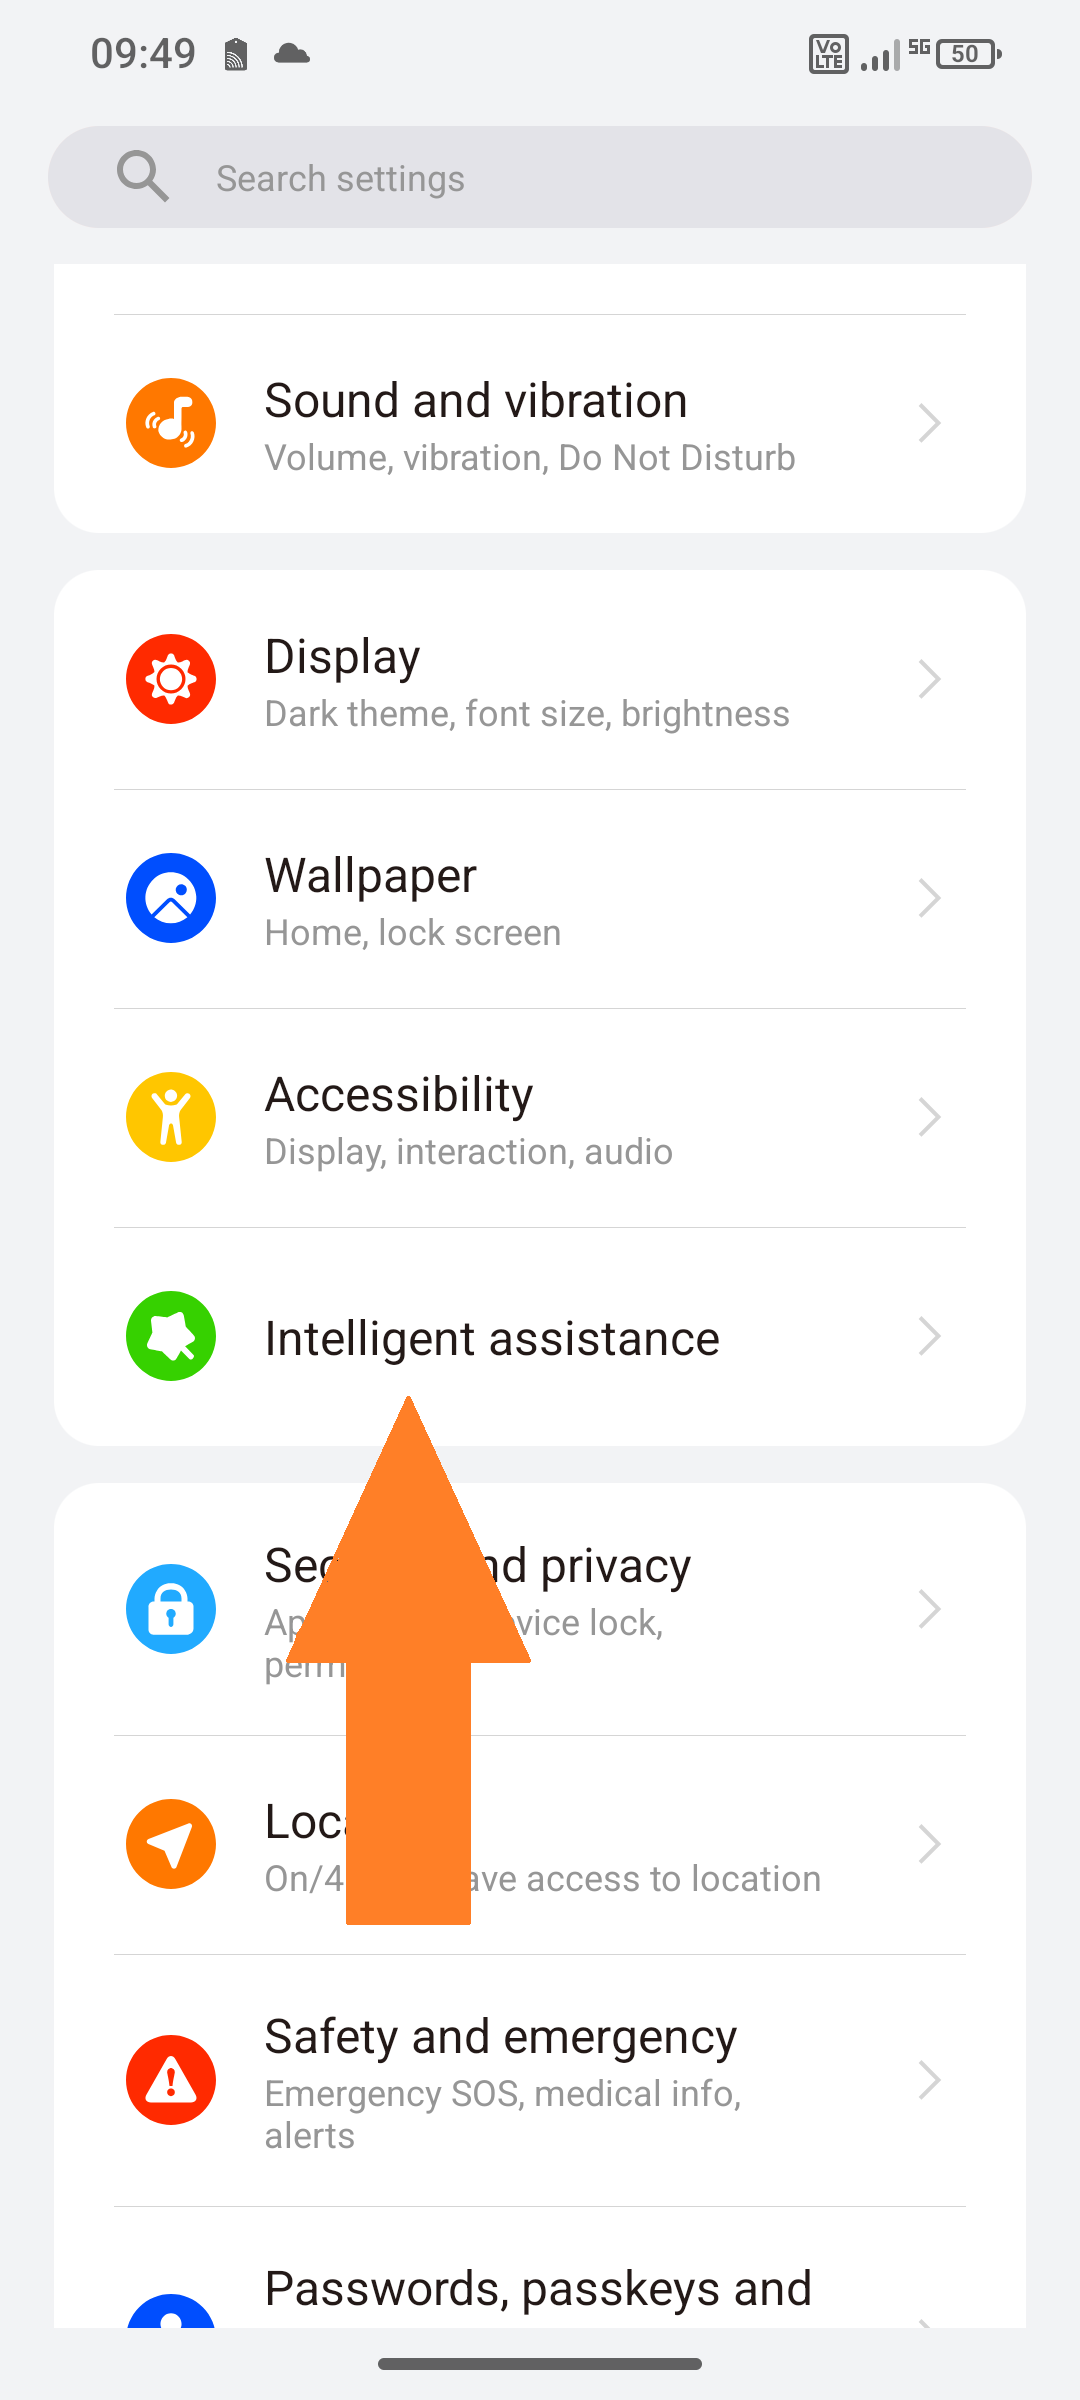 |
3. "Three finger screenshot" | 3. "Gestures"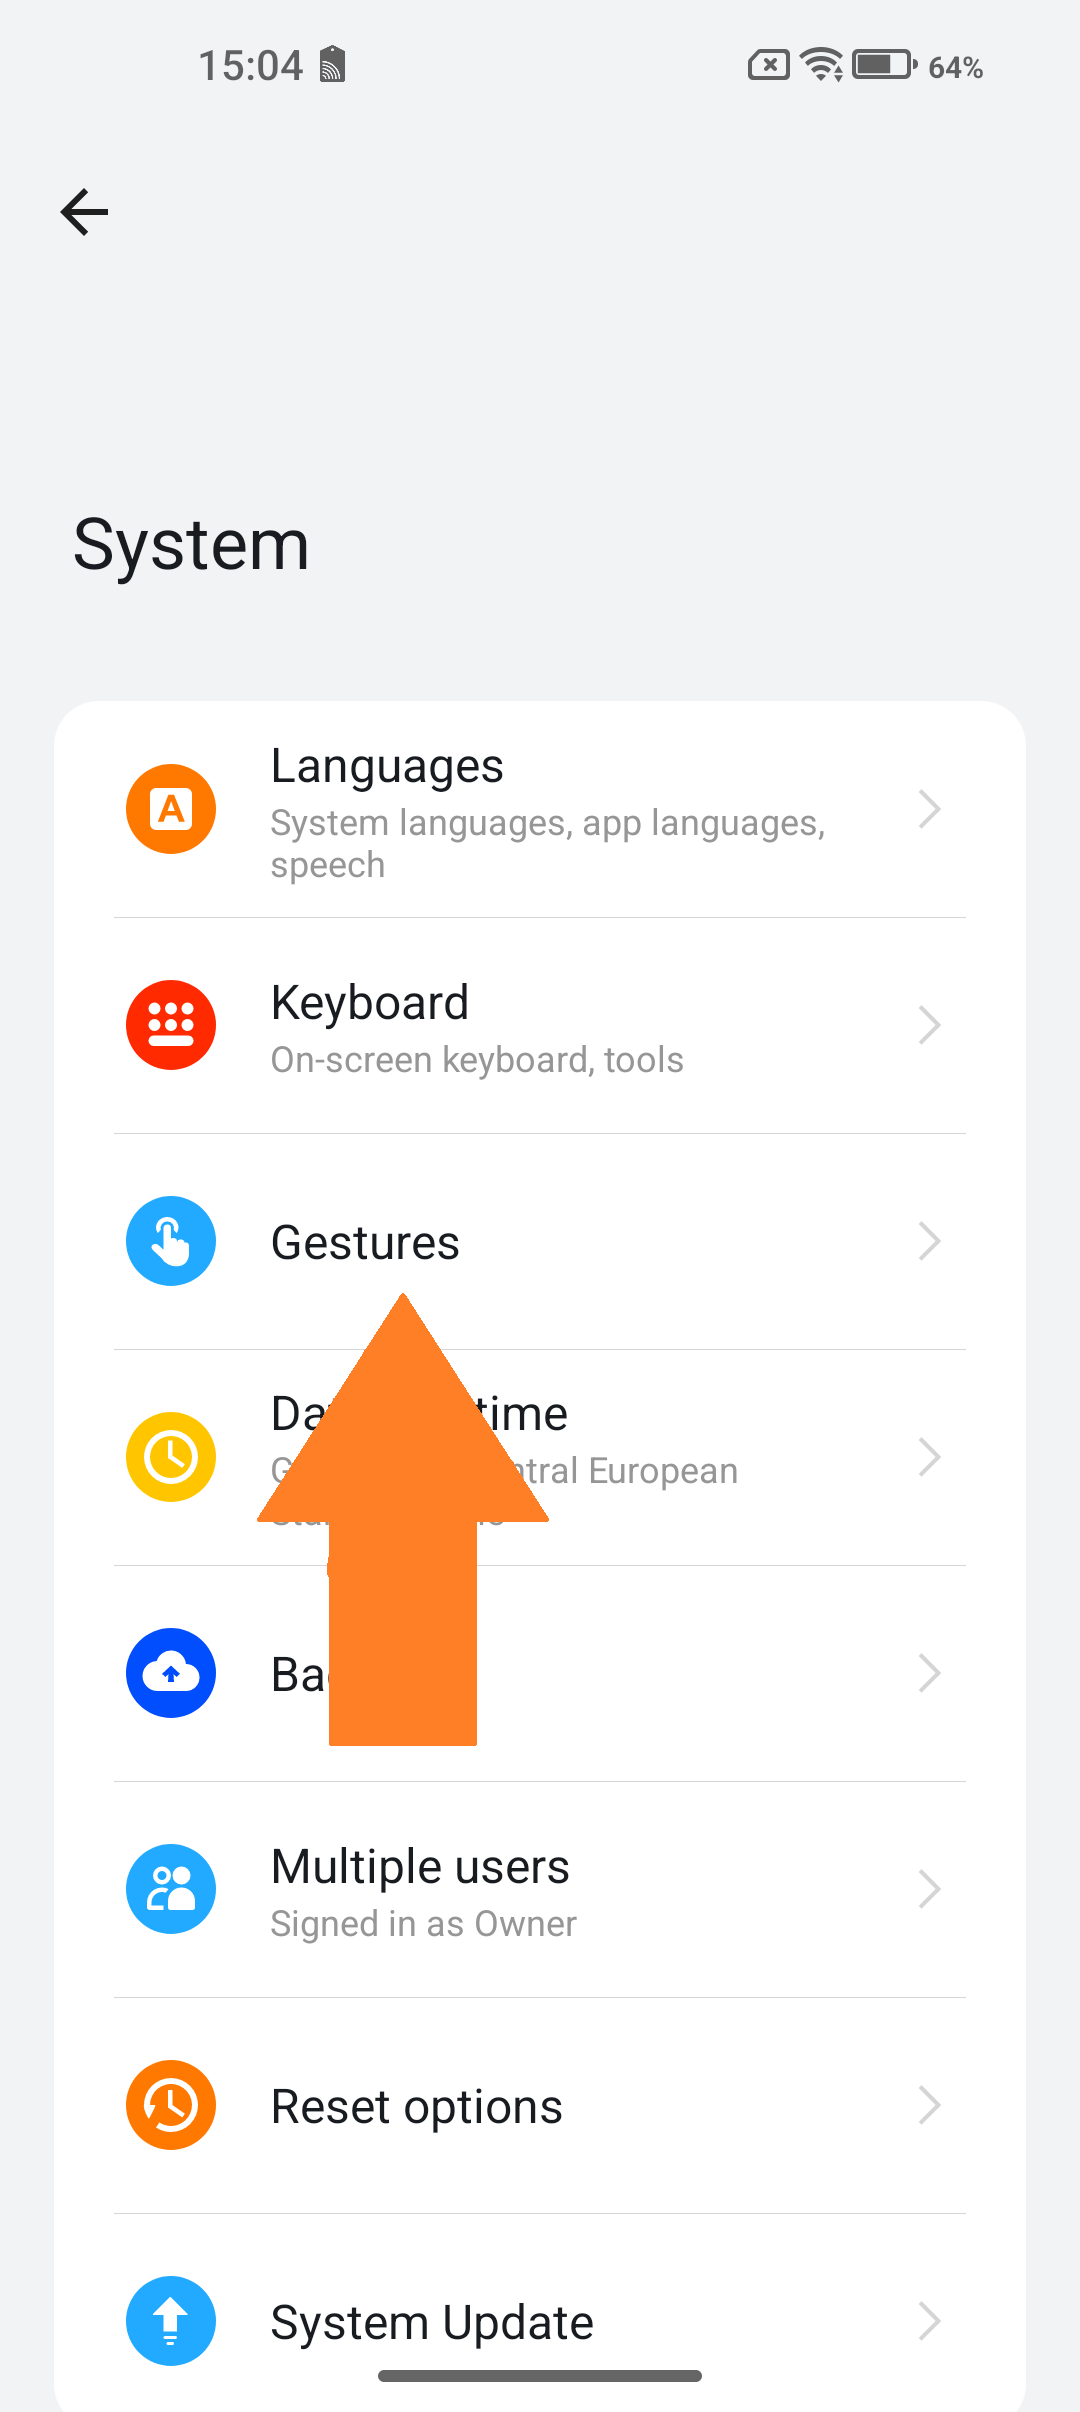 | 3. "Three finger screenshot"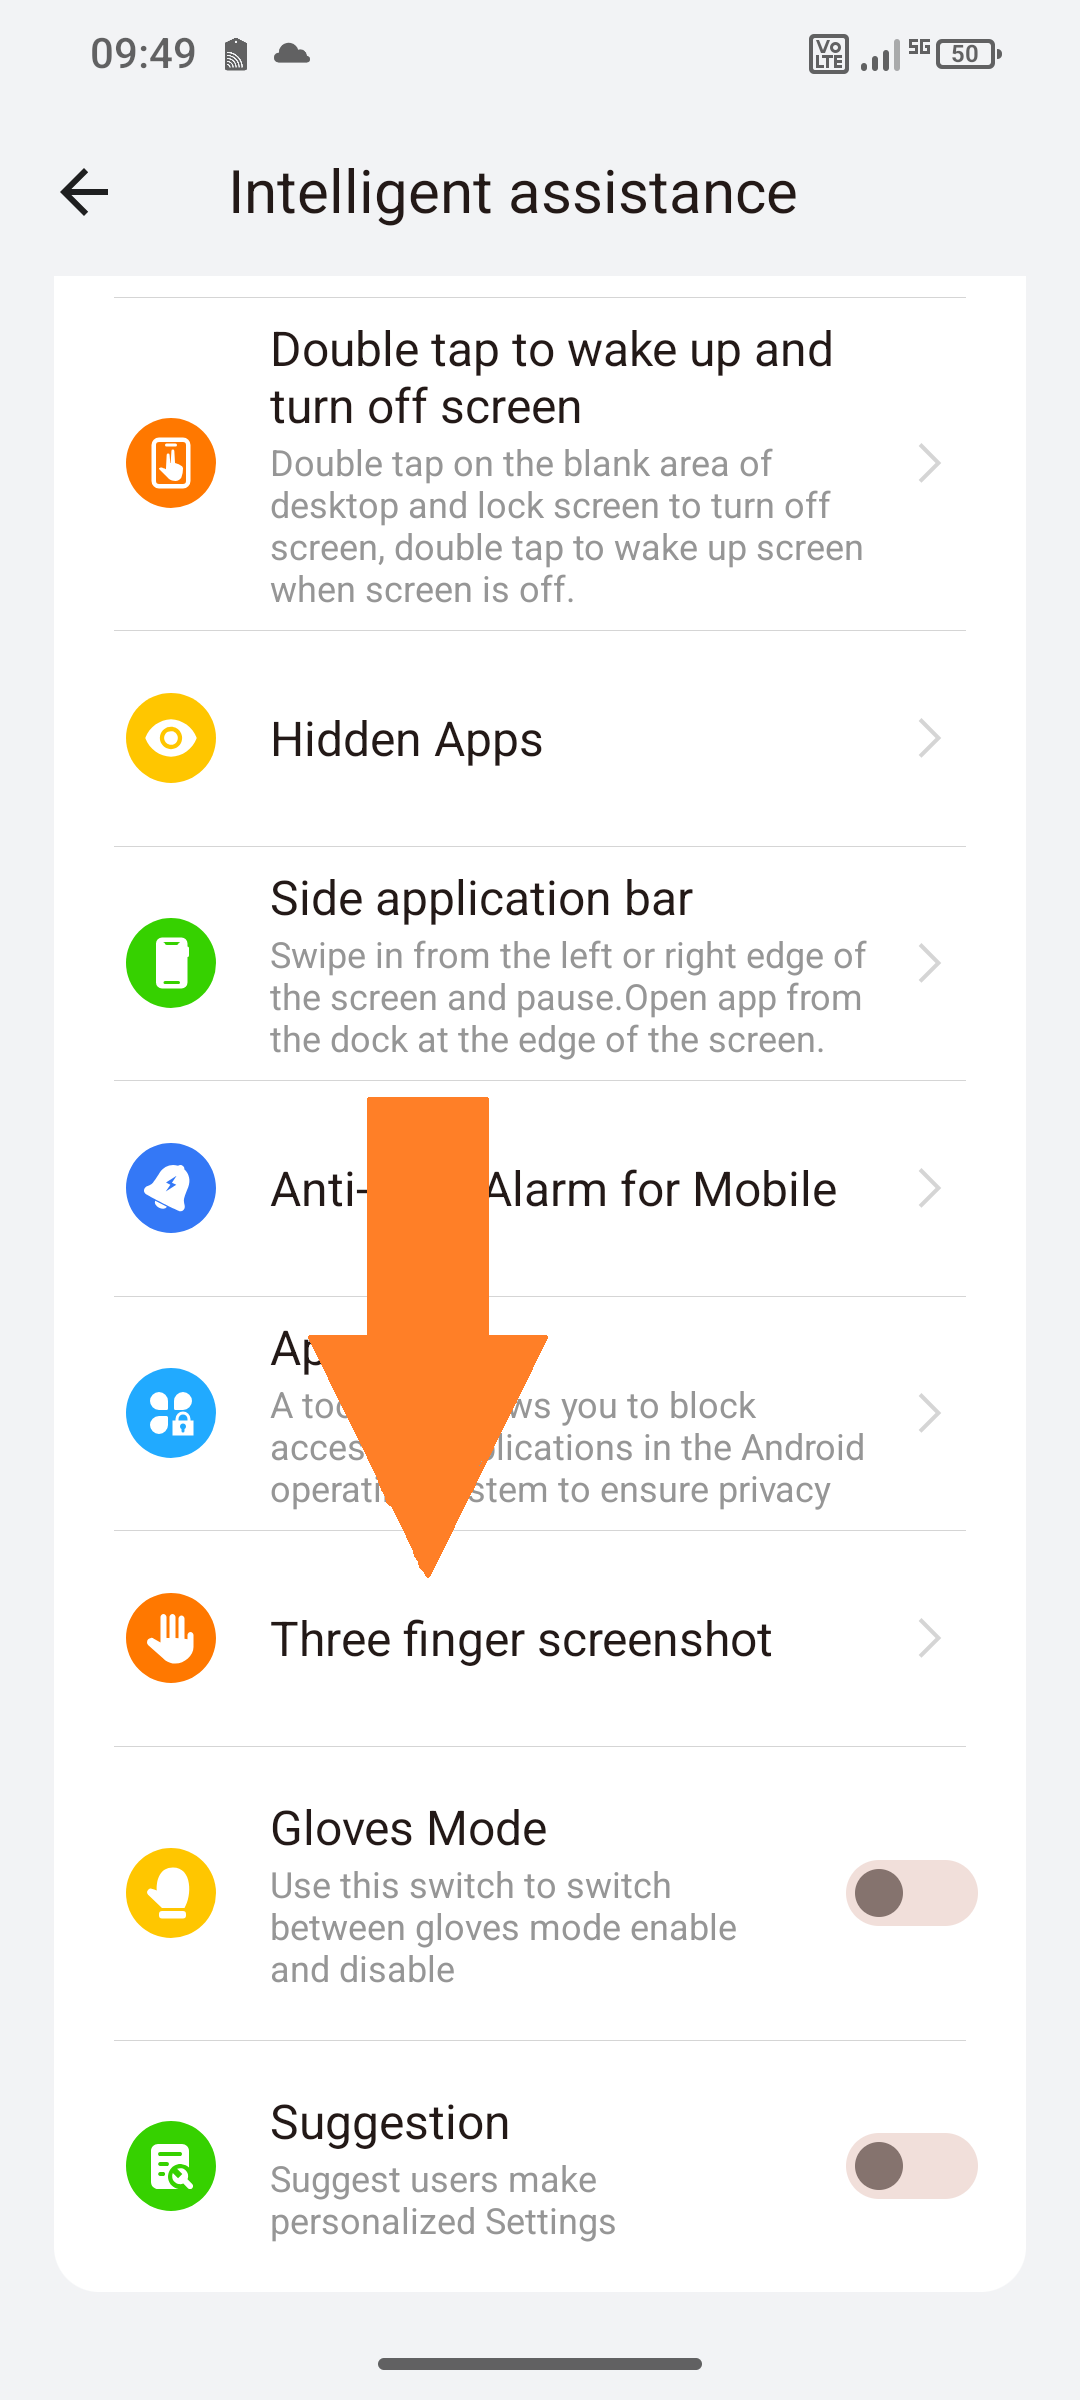 |
4. "Three finger screenshot"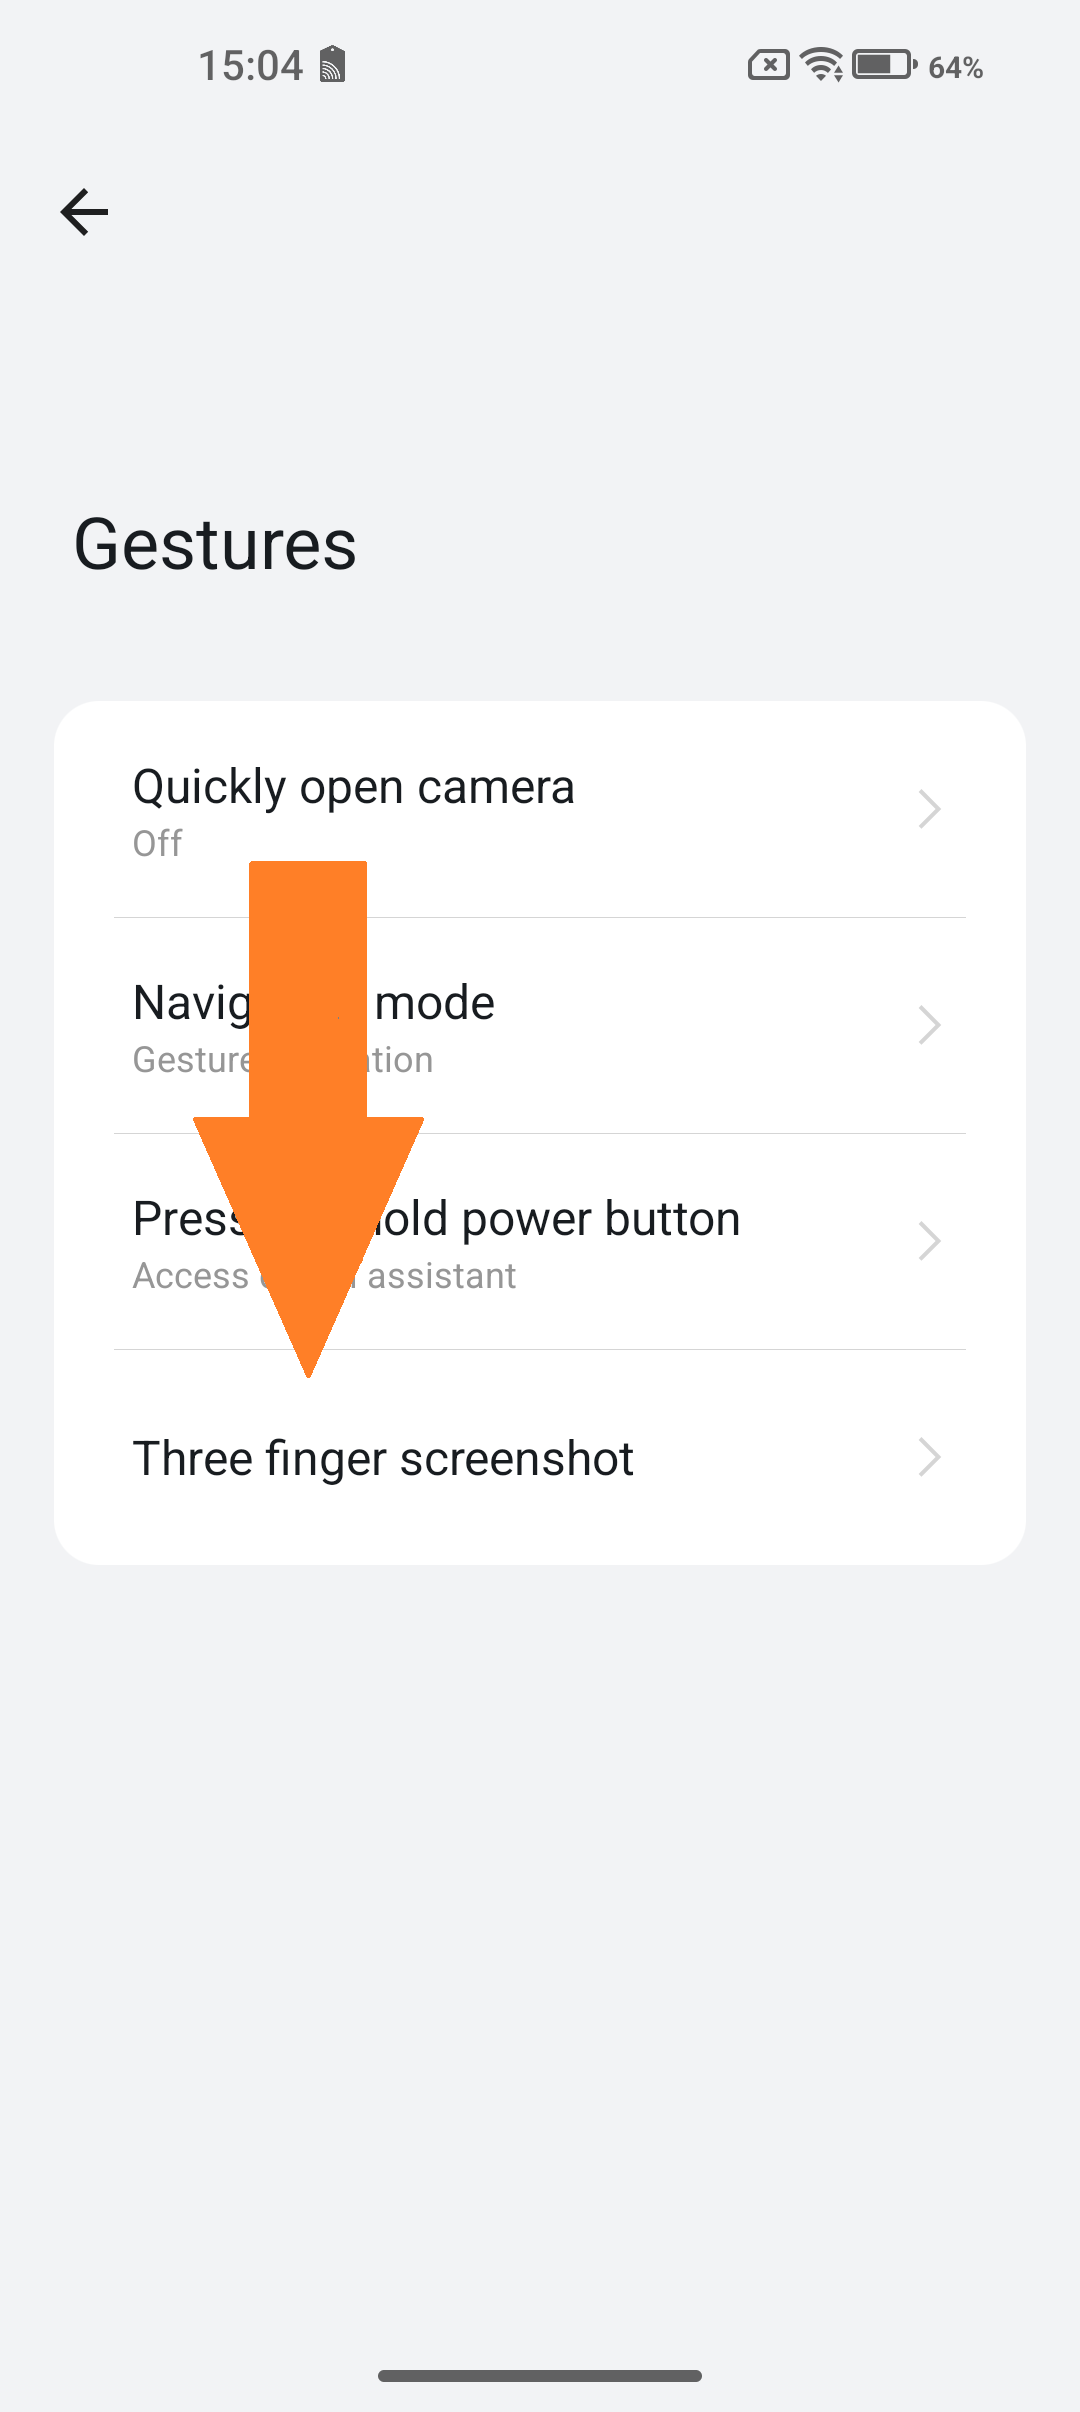 | 4. Do your settings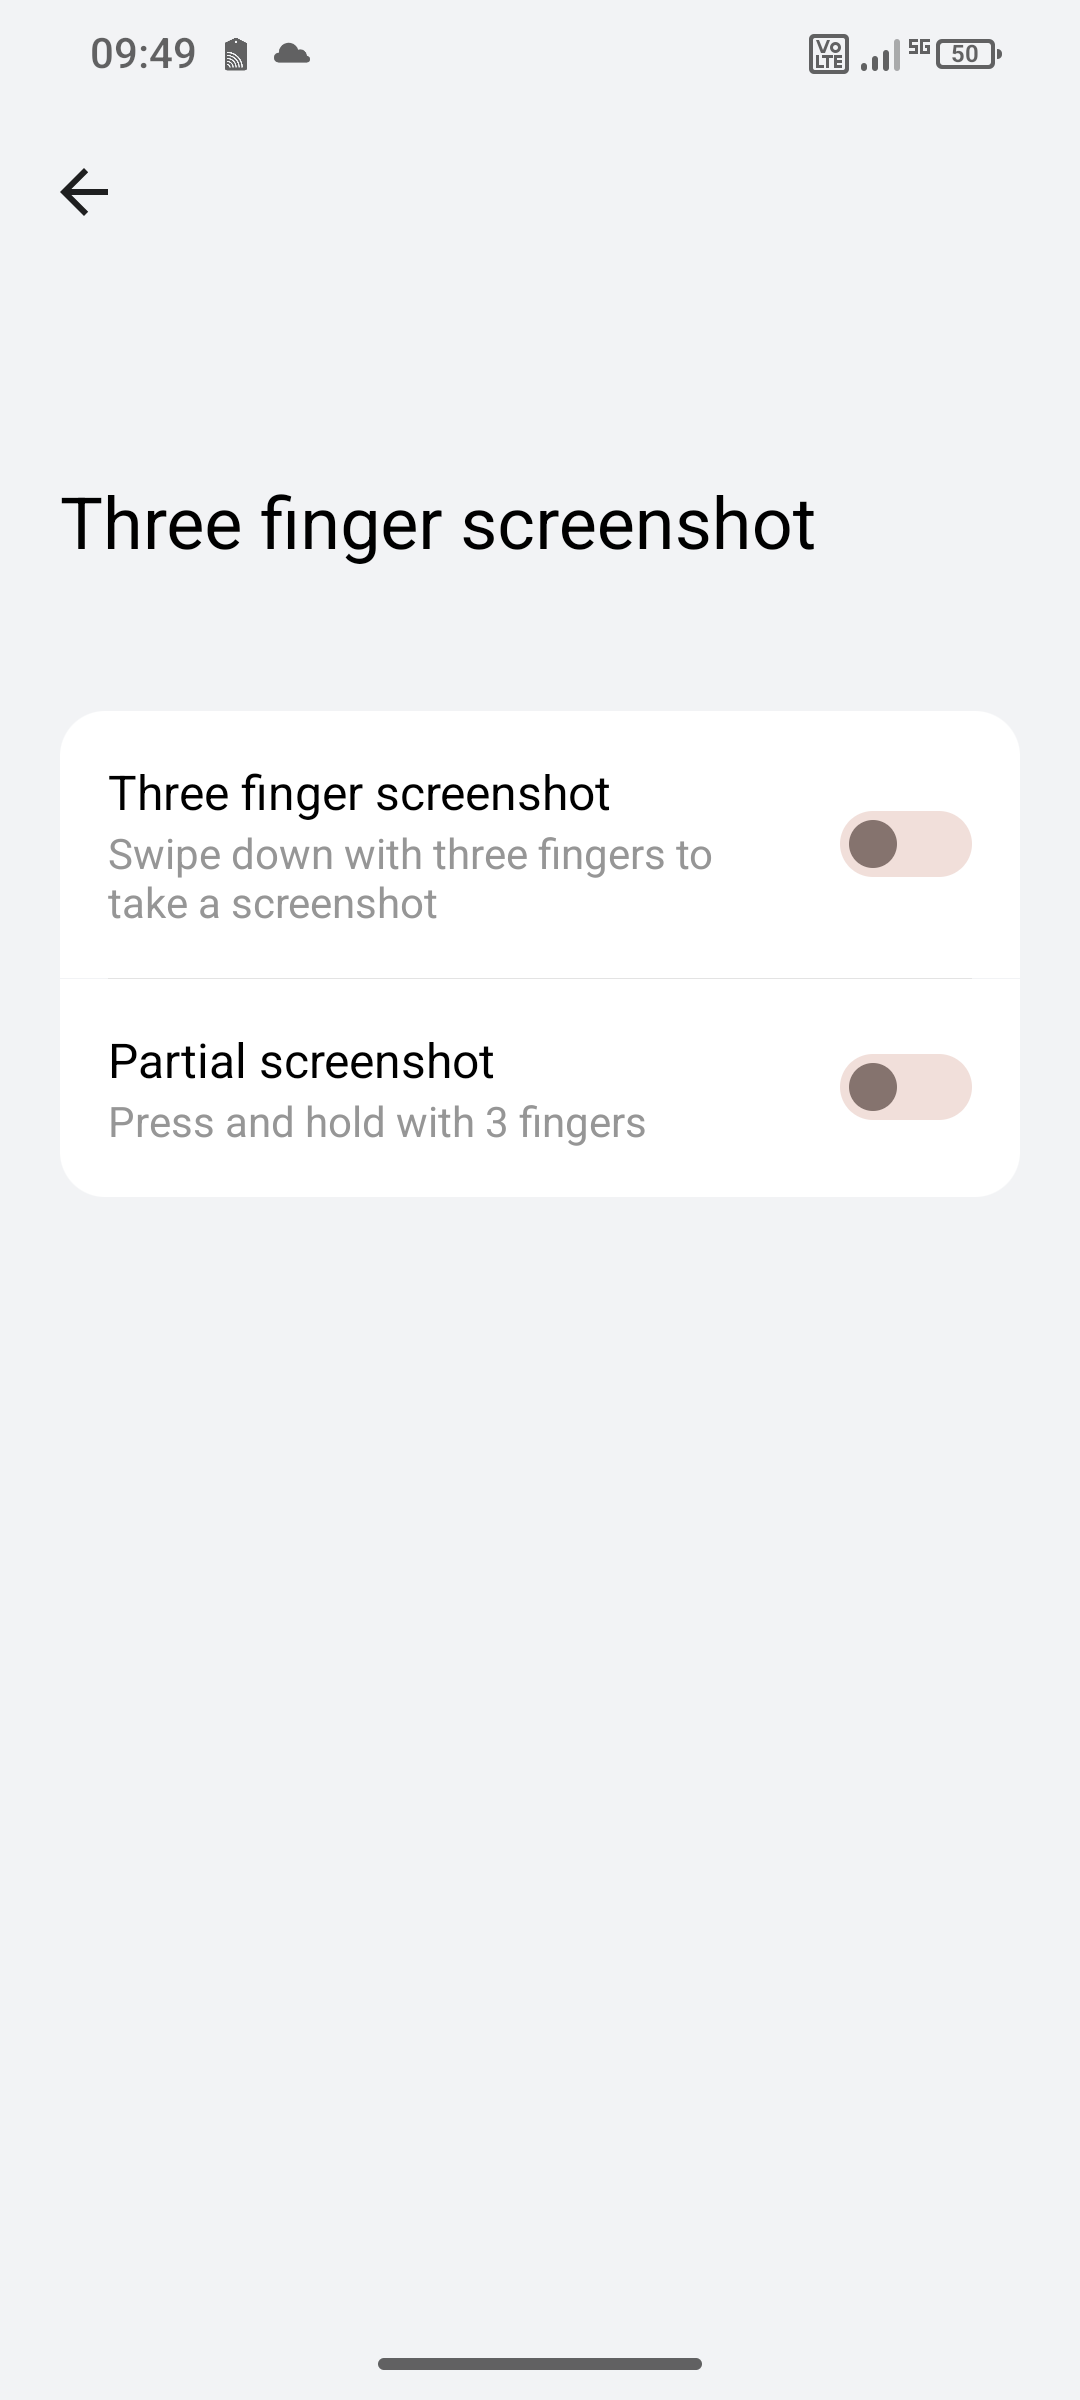 |
5. Do your settings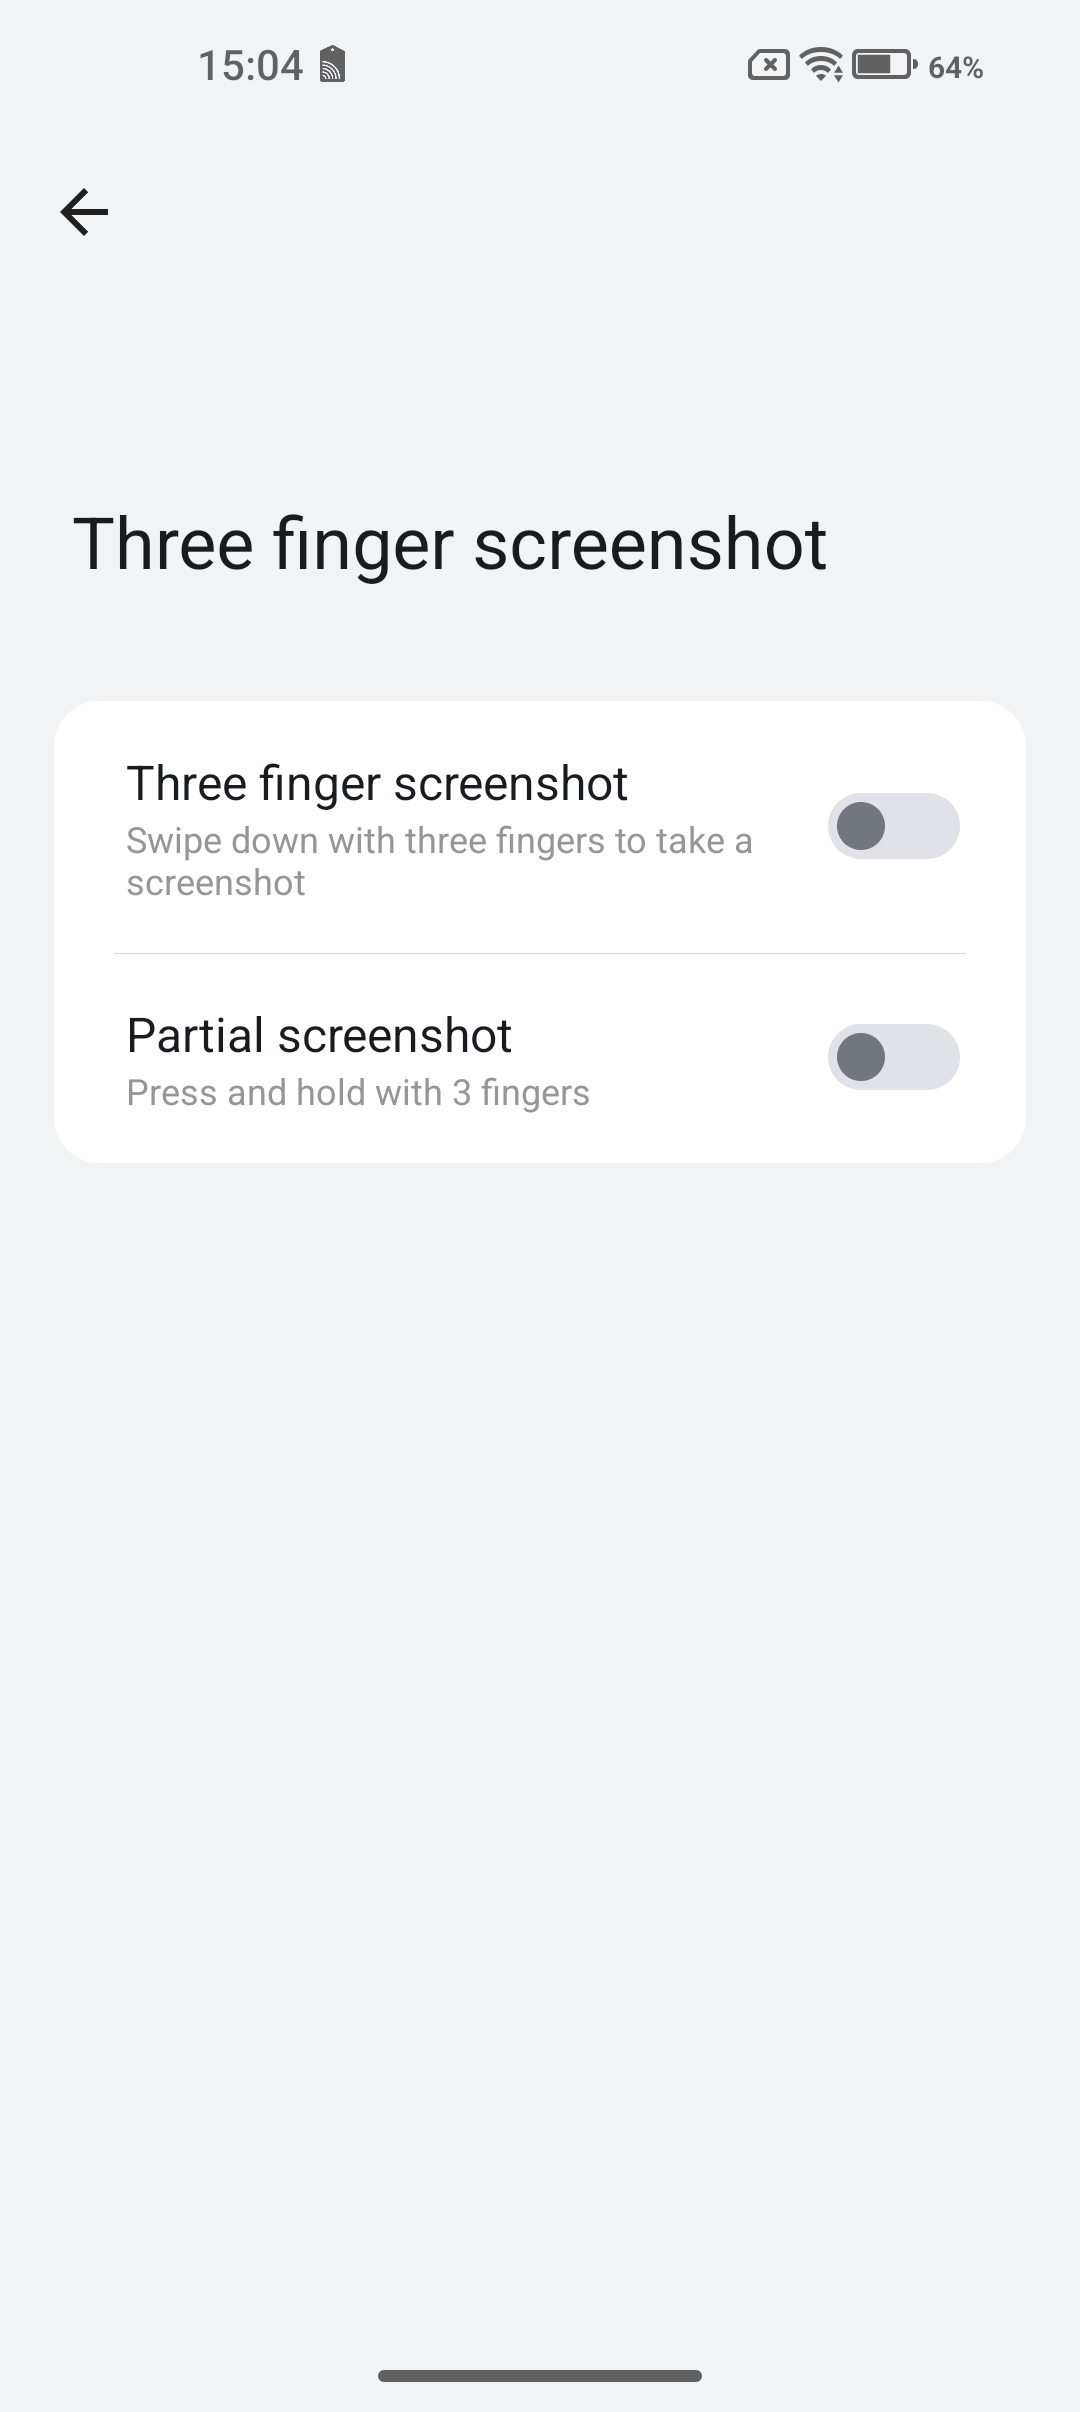 |
Super Screenshot:
The Super Screenshot is an app pre-installed by Gigaset that offers many different functions for screen capture of the display.
Where you can find the Super Screenshot app:
Android 13/14/15 |
1. Swipe 2x from the upper area of the display downwards |
2. There you can open the Super Screenshot app |
3. If you can't find the Super Screenshot app, click the highlighted button. |
4. Press and hold the "Super Screen" tile and drag it upwards. |
Functions of the Super Screenshot app:
1. Move:
Android 13/14/15 |
| 1. Open the Super Screenshot app |
2. Tap and hold the "Move" button. Then you can place the function menu at any position. |
2. Funny:
| Android 13/14/15 |
| Explanation: This gives you the possibility to customize your screenshot. You can adjust the actually usual rectangular shape of the screenshot as you like. |
| 1. Open the Super Screenshot app |
2. Tap the "Funny" button |
3. Here you have different functions to create a screenshot with any form |
3. Long:
| Android 13/14/15 |
| 1. Open the Super Screenshot app |
2. Tap on the "Long" button |
3. Tap the highlighted button |
4. Here you can select the area for the screenshot, edit it and finally safe it. |
4. Screen Recording:
| Android 13 | Android 14/15 |
| Explanation: Here you have the possibility to record a video from your screen. | |
1. Tap on the "Screen recording" button | 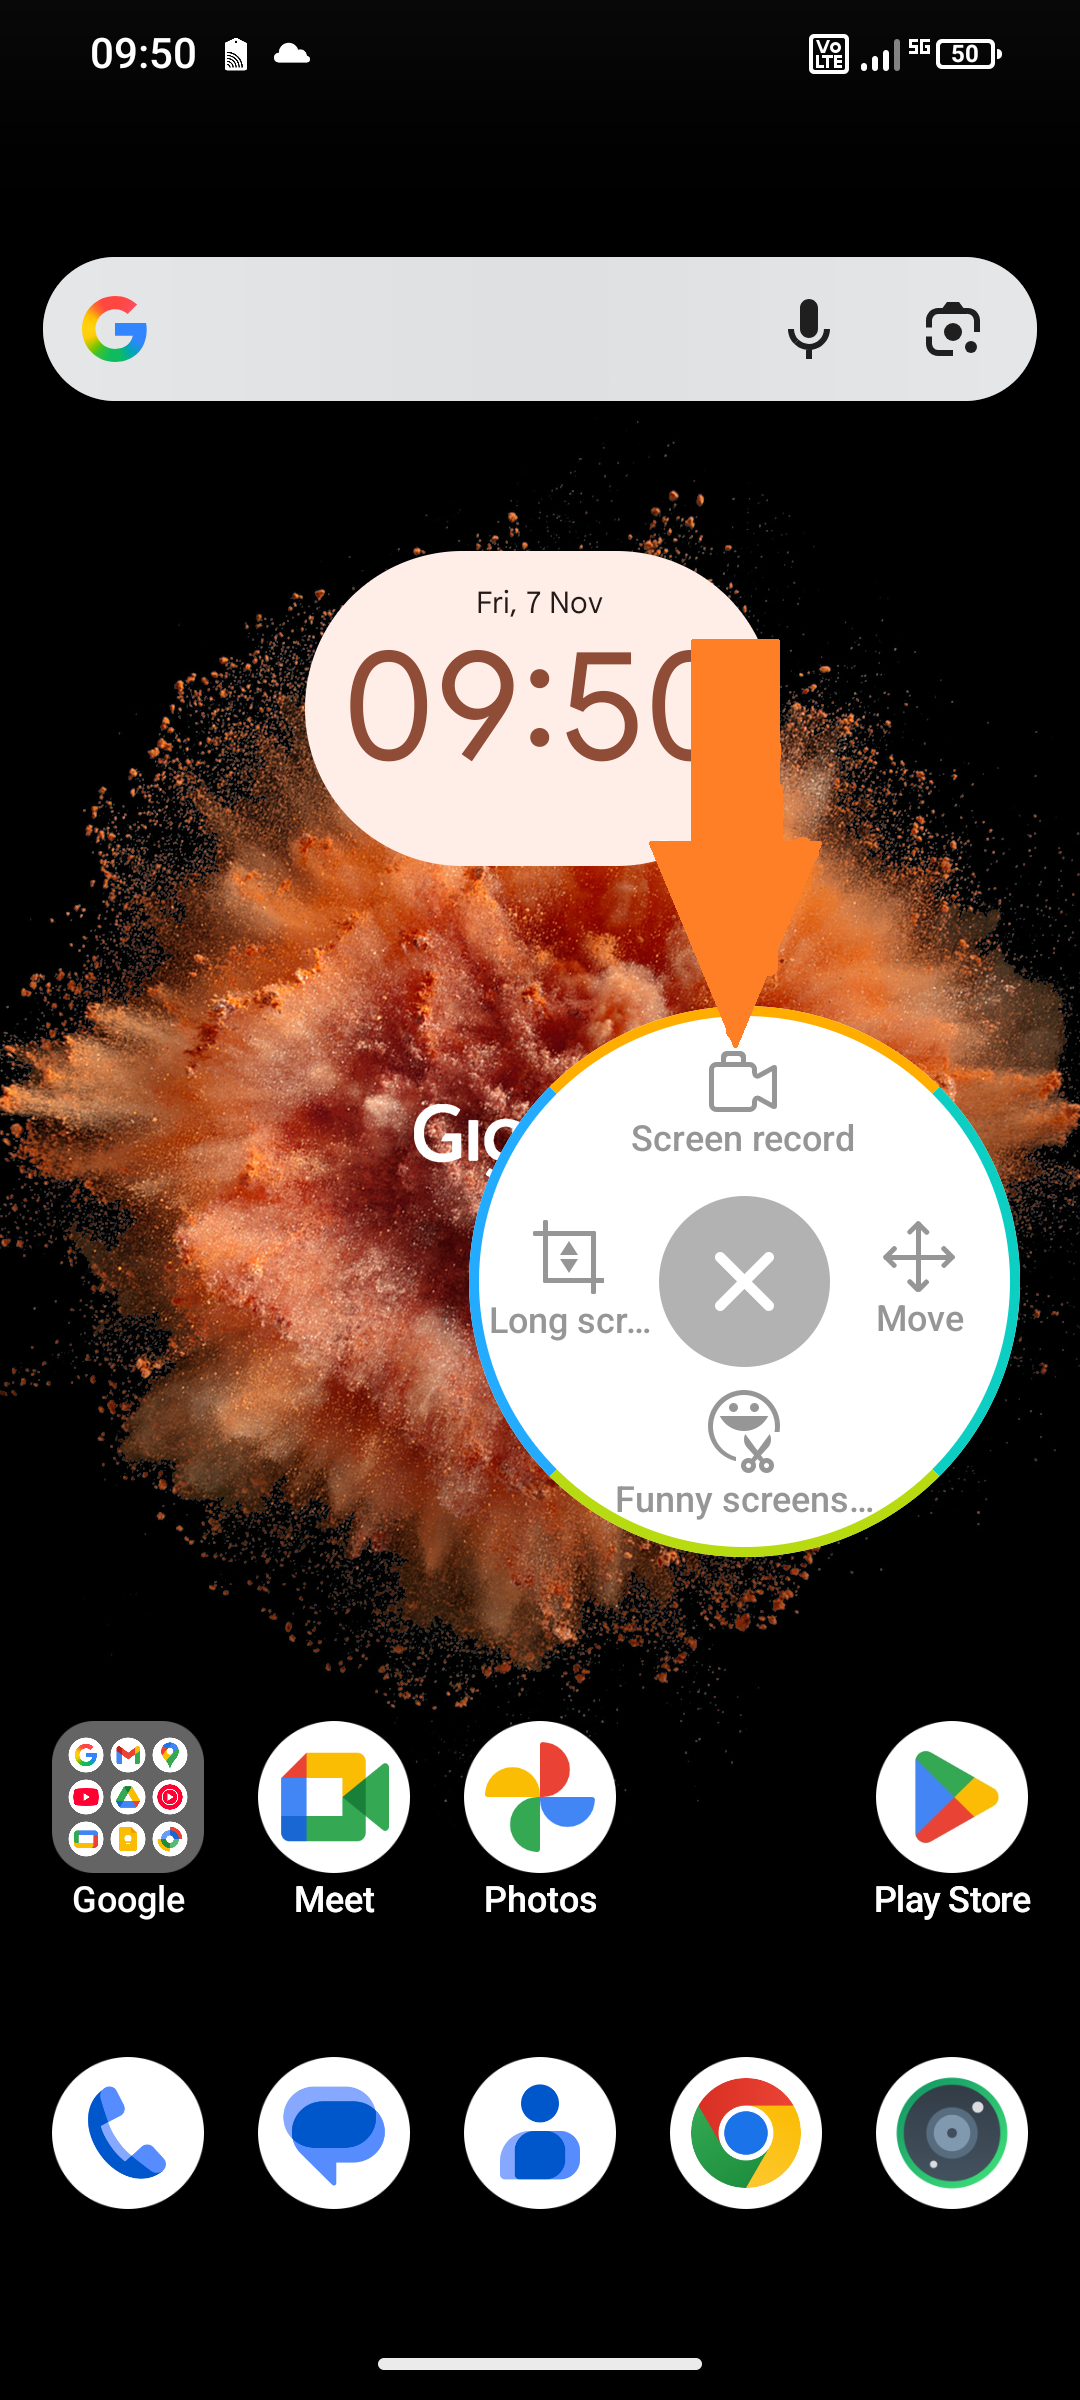 |
2. Tap the highlighted button to start recording | 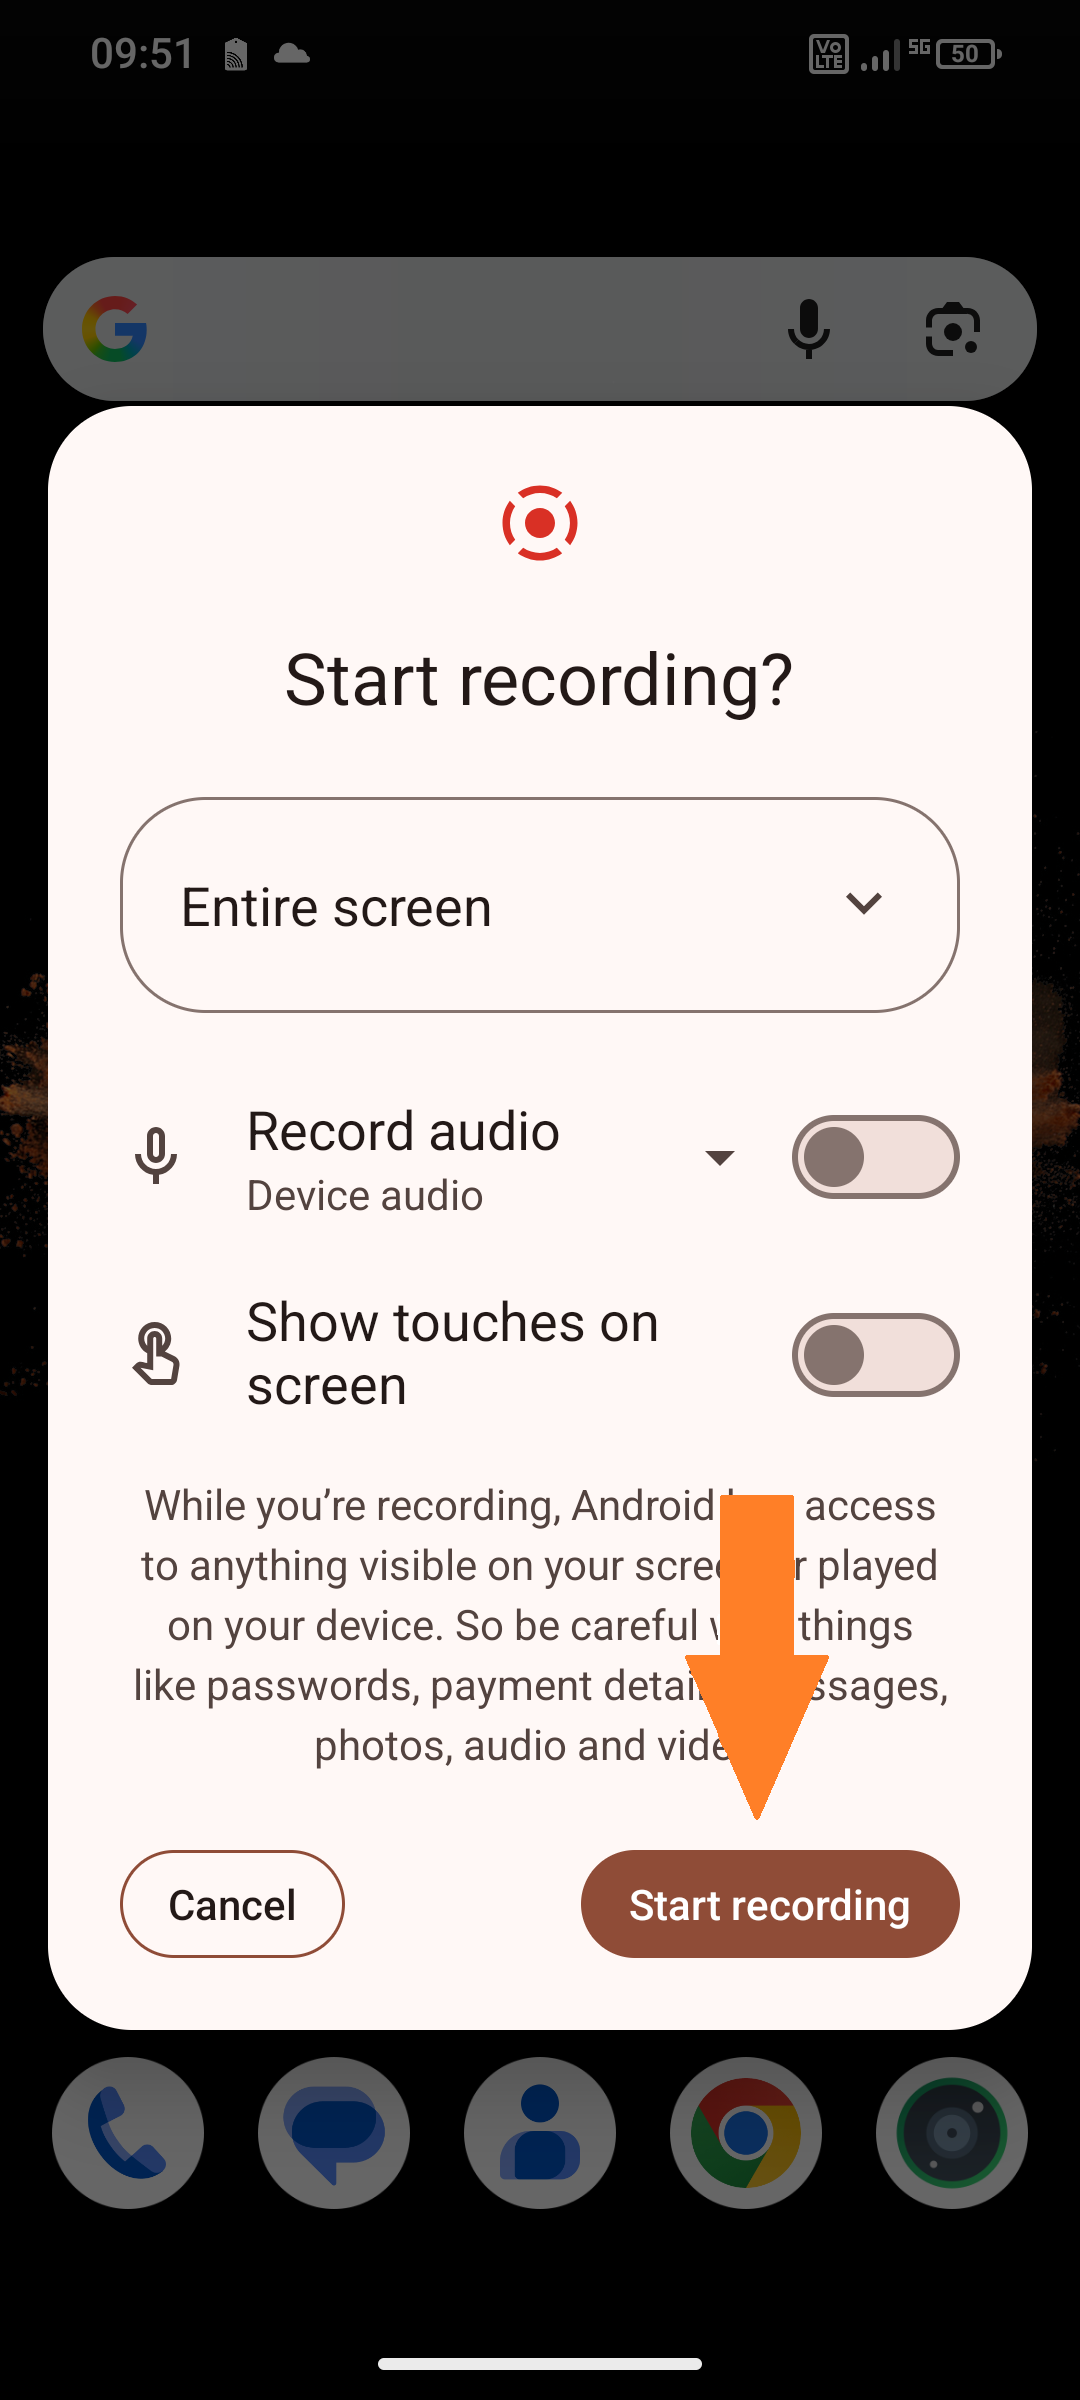 |
3. This is where you can see the recording on your home screen.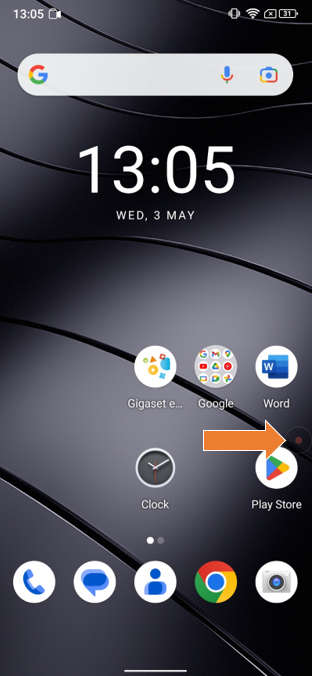 | 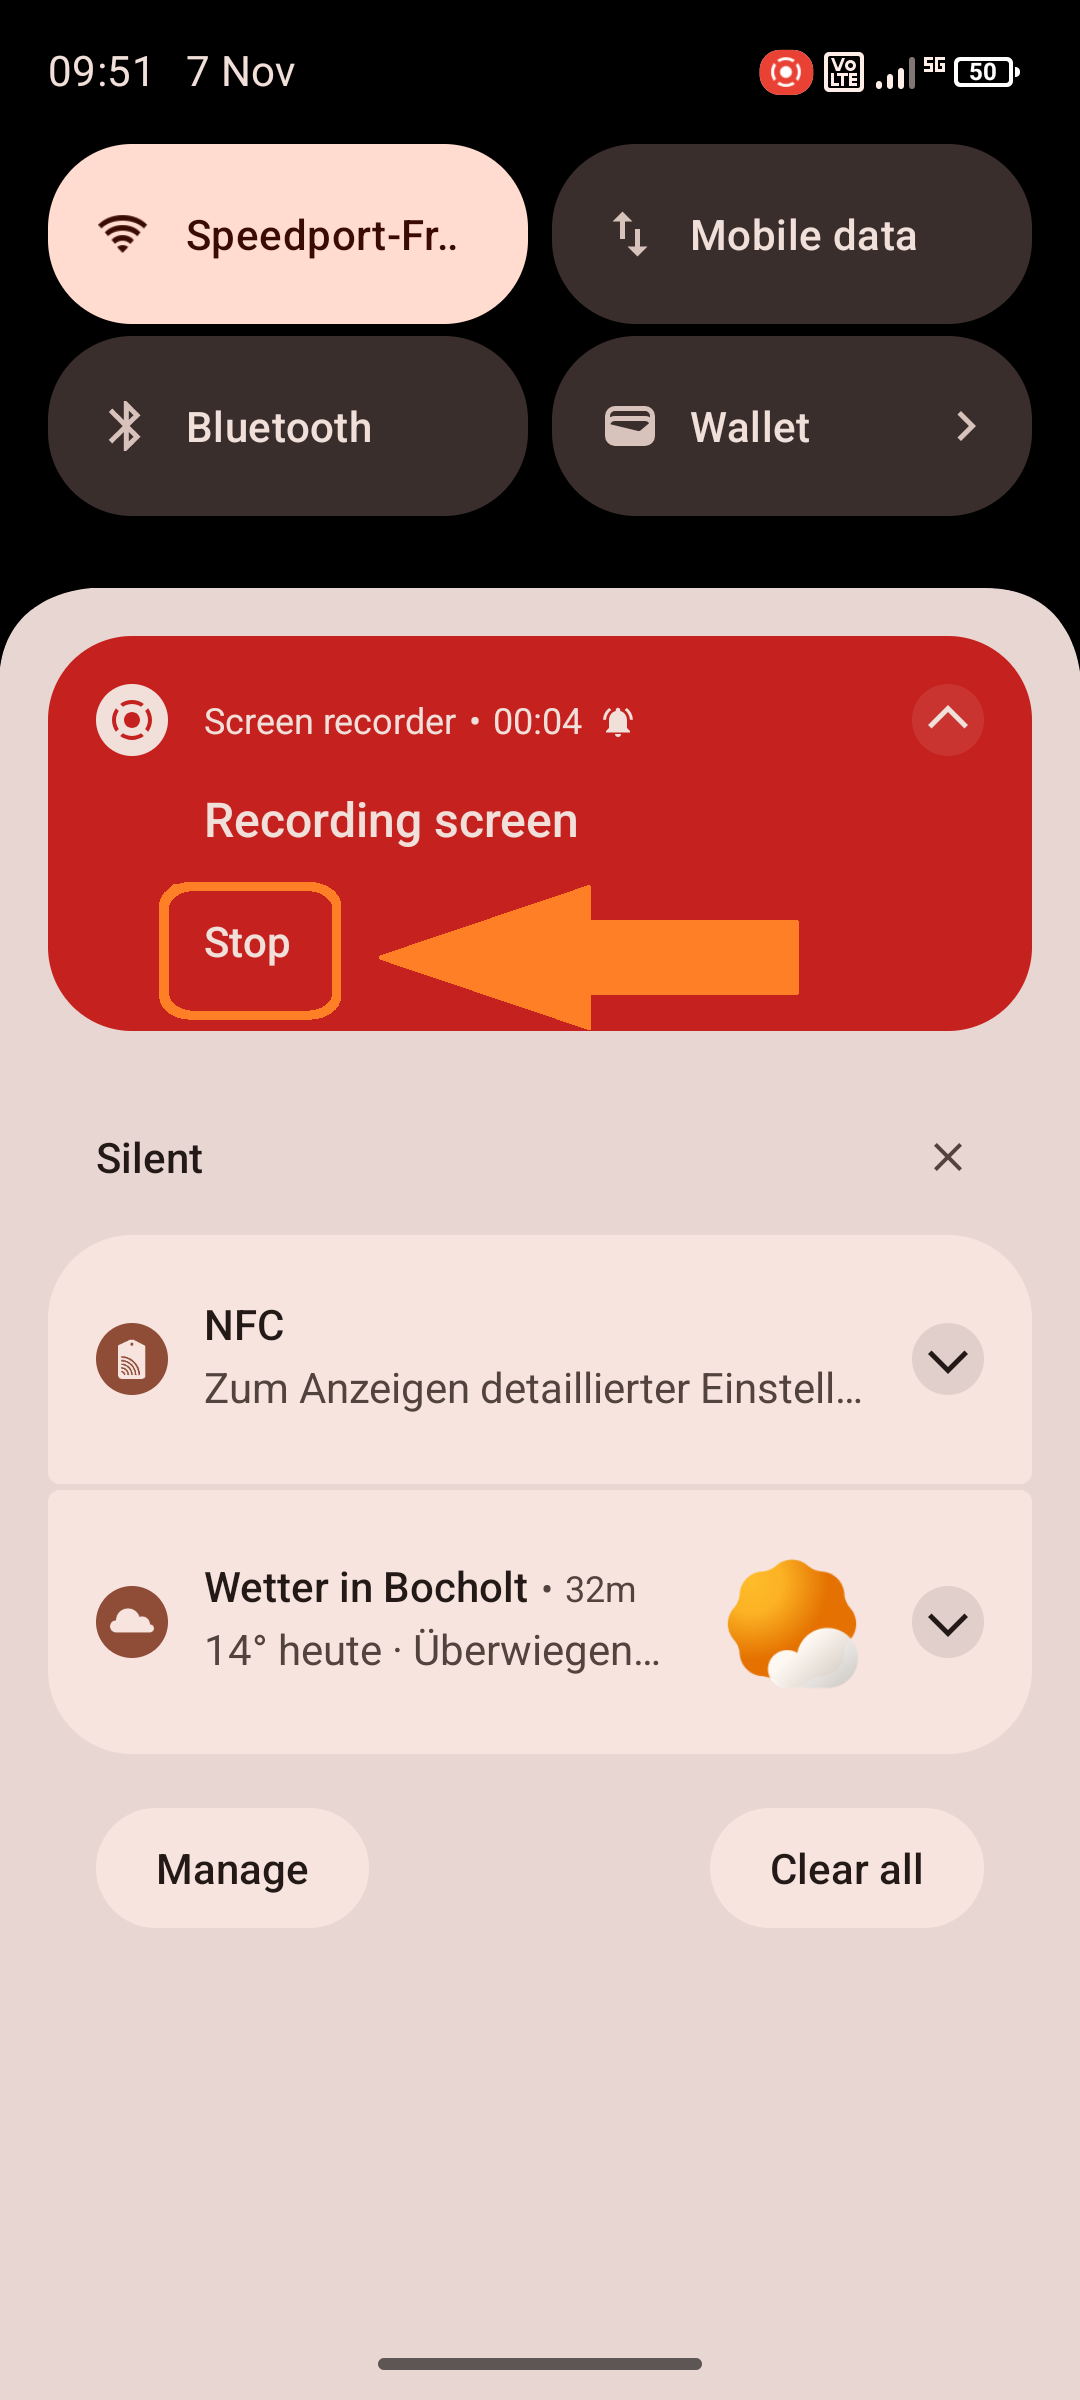 |
4. If you want to end the recording, tap the highlighted buttons. |
Bu makale sizin için faydalı oldu mu?
Harika!
Geri bildiriminiz için teşekkür ederiz
Üzgünüz! Size yardımcı olamadık
Geri bildiriminiz için teşekkür ederiz
Geri bildirim gönderildi
Çabanızı takdir ediyoruz ve makaleyi düzeltmeye çalışacağız