Topic:
General explanation of the camera app
Explanation of the camera functions
Explanation of megapixel and image size selection
Explanation of the camera modes
Google Lens (from Android 14/15)
The camera app offers numerous setting options to capture the perfect picture.
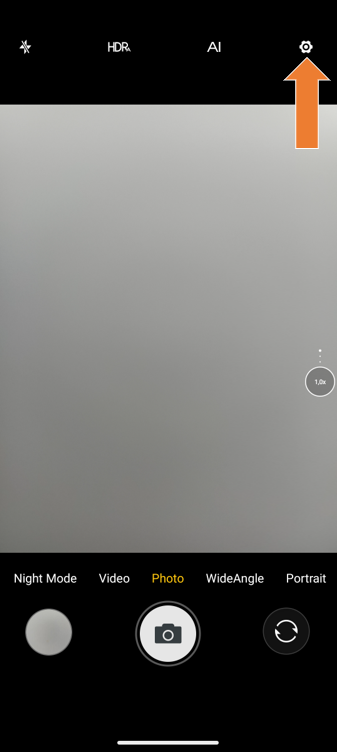
Explanation of the camera app:
| 1. Open the camera app. | 2. Tap the highlighted button to take a picture. | 3. Using the slider on the right side you can regulate the distance of the image. |
Tap the highlighted button to open the front camera. | 5. Tap the highlighted button to view your recorded image. |
Explanation of the functions:
Flash | HDR | AI | Filter |
Explanation: The flash when taking pictures serves as an additional light source. It makes sense to use the flash in backlit situations, because there the flash helps to illuminate the image evenly. | Explanation: HDR is a feature of the camera app. The camera takes several pictures in succession. The software then merges the captured images into a single photo. The result is images with optimal exposure, more details and strong contrasts. When taking pictures of landscapes, the HDR function can be very helpful. | Explanation: AI is an automatic mode that detects scenes such as landscapes, portraits and objects. AI mode adjusts the camera settings to the detected scene or object. This allows you to take better photos. | Explanation: The camera filter filters out unwanted parts. As an example there is the black and white filter. |
1. Tap the highlighted button. | 1. Tap the highlighted button. | 1. Tap the highlighted button to select the appropriate filter.  | 1. Tap the highlighted button to select the appropriate filter. |
2. Here you can adjust your flash settings. | 2. Here you can adjust your HDR settings.  |
To adjust the settings to your needs:
Android 13 | ||
1. Open the camera app. | 1. Tap the highlighted button.
| 3. You can call up sub-settings by tapping on the highlighted button (since Android 12). |

We have Custom/Picture size/Location info/Brand watermark/Camera mute/Touch shooting/Self timer/Grid line/ZSD/Volume key feature/Anti-flicker/Reset.
Android 14 | ||
1. Open the camera app | 1. Tap the highlighted button
| 3. You can call up sub-settings by tapping on the highlighted button (since Android 12). |

We have Picture size/Location info/Branwatermark/Cameramute/Touch shooting/Self timer/Grid line/ZSD/Volume key feature/Anti-flicker/Long press/Custom..
Android 15 | ||
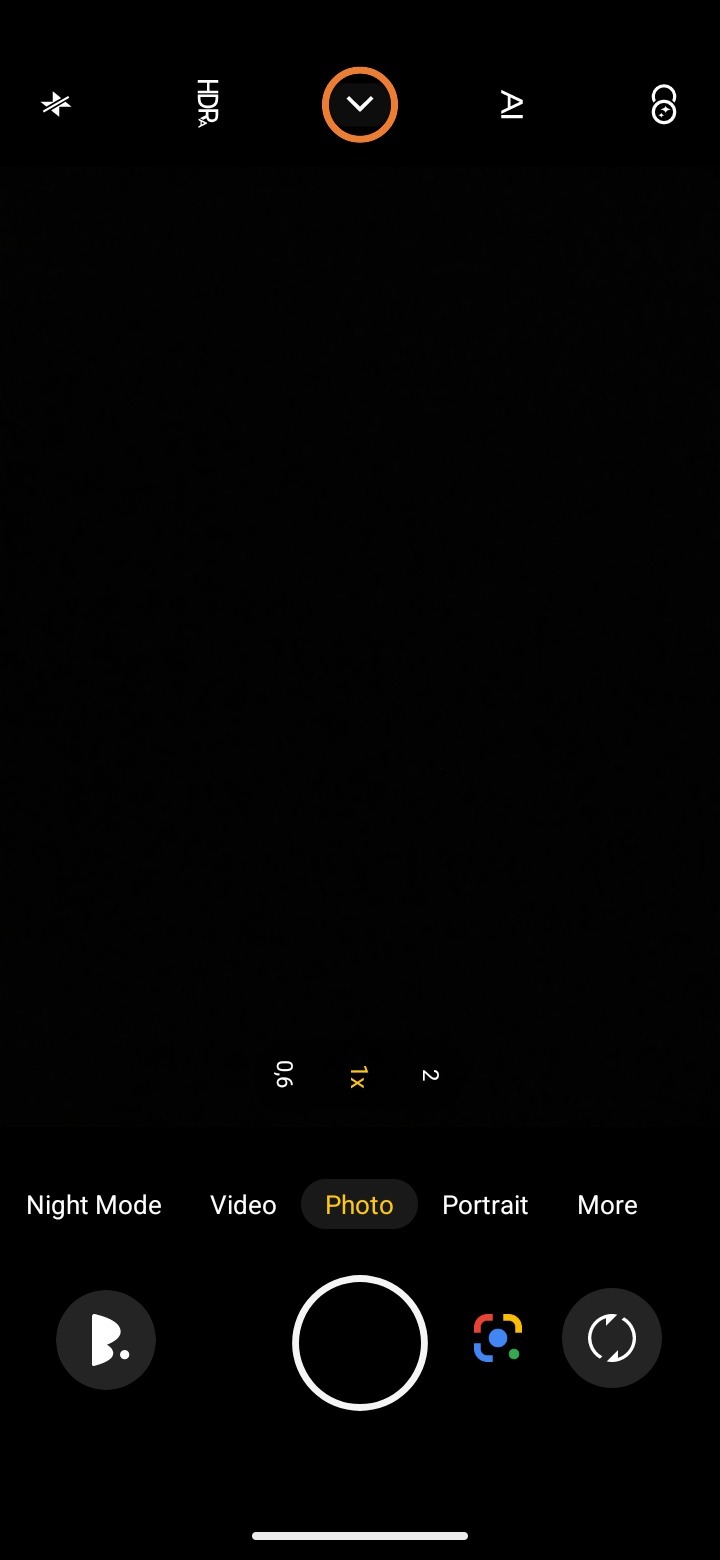
| 1. Open the camera app. | 2. Click on the arrow in the center.  | 3. You can access it by tapping the highlighted button under Settings (Android 12 and higher). |
You can also set the megapixel and image size. This allows you to adjust the quality and file size of your images according to your individual requirements. For example, you can save storage space or capture the best possible result.
| Android 13 | Android 14 | Android 15 |
|---|---|---|
| 1. Open the camera app. | 1. Open the camera app. | 1. Open the camera app. |
2. Click on the cogwheel at the top right. 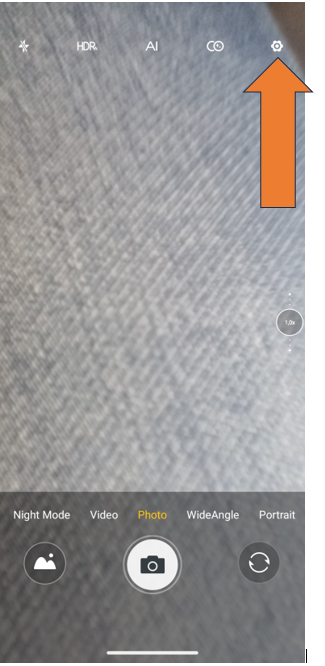 | 2. Click on the circled icon.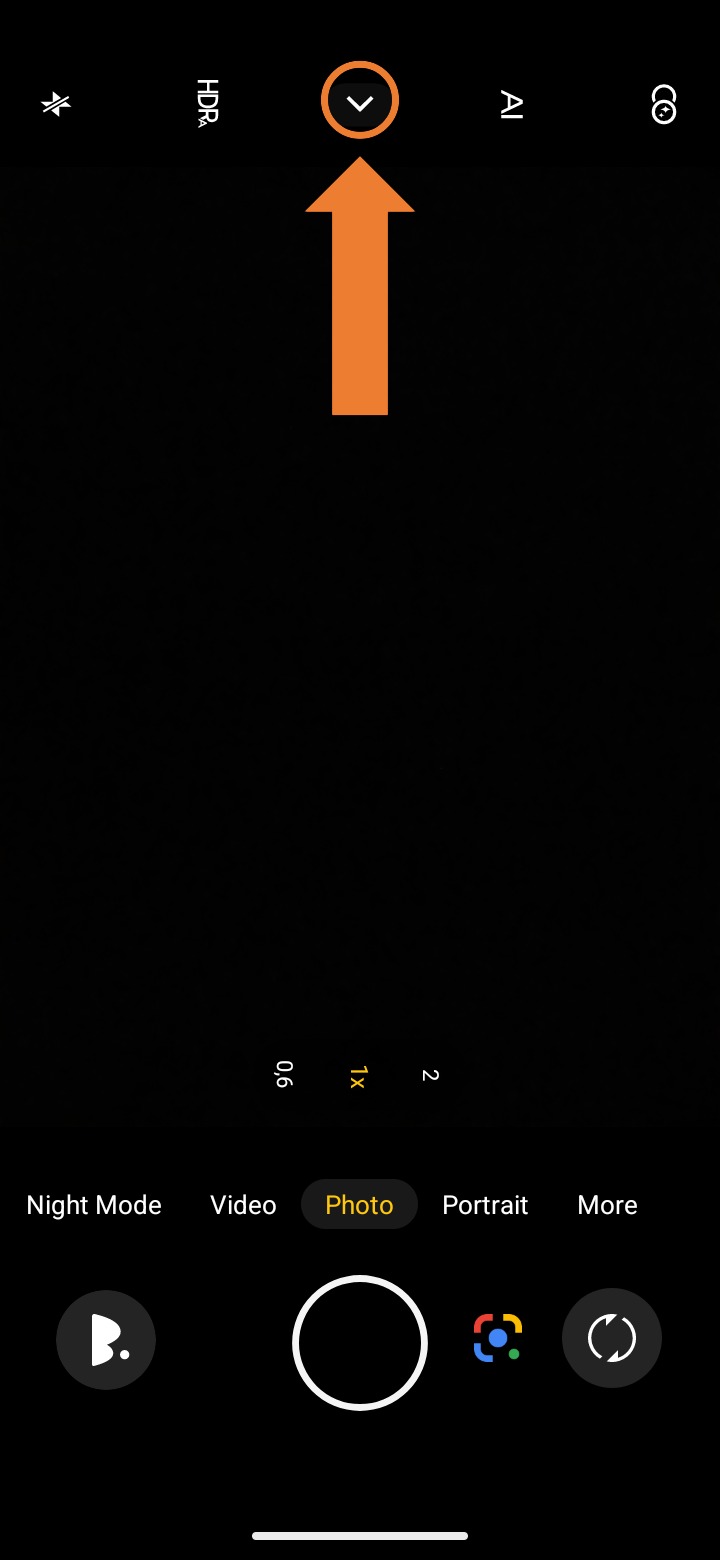 | 2. Click on the circled icon.
|
3. Click on "Picture size".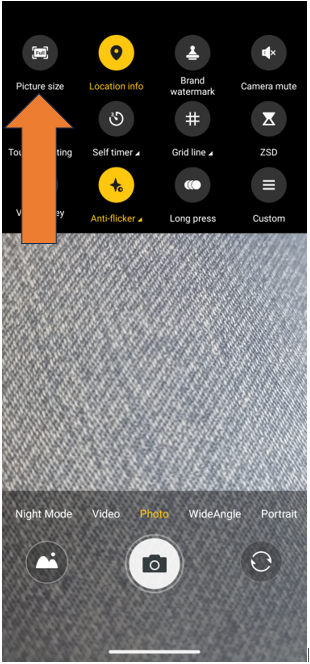 | 3. Click on "Picture size".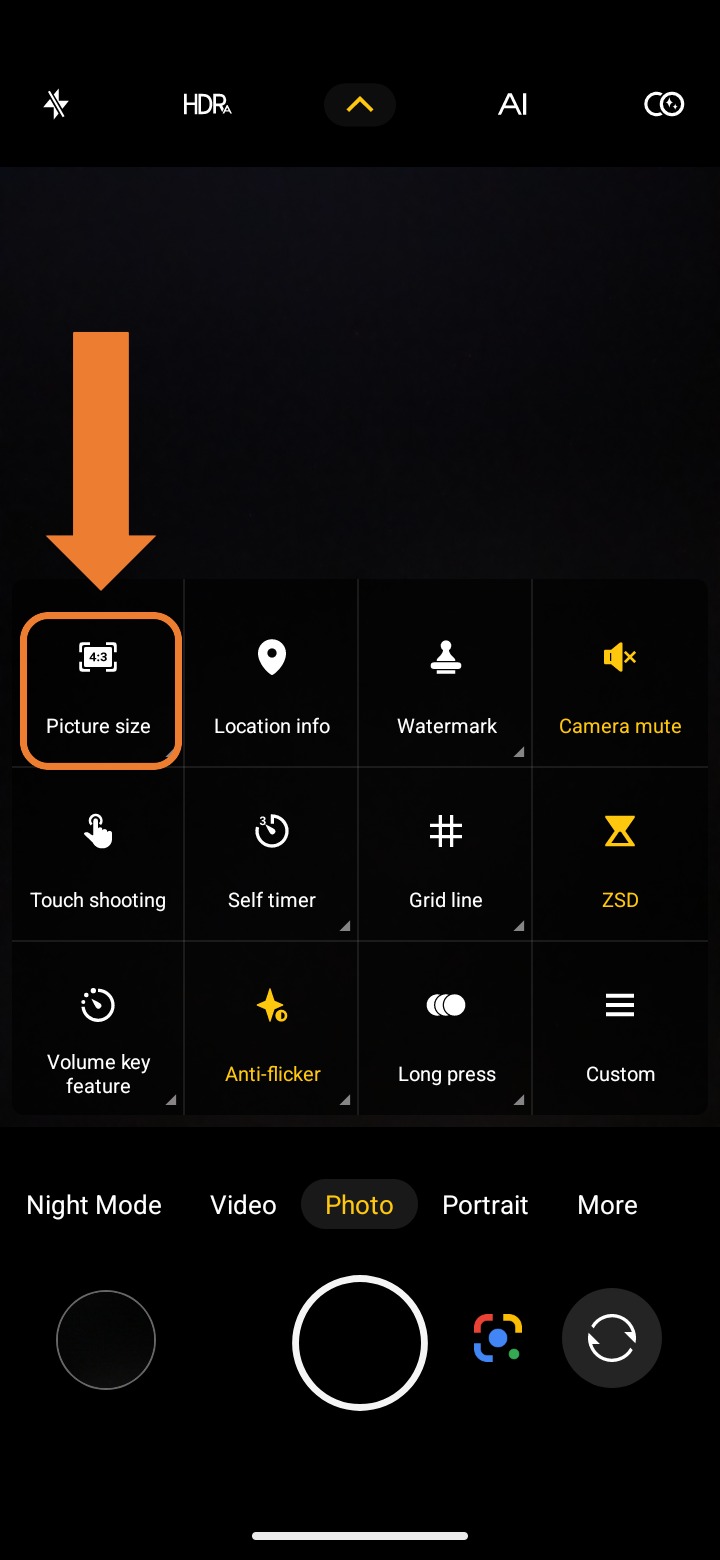 | 3. Click on "Picture size". |
4. Select your setting.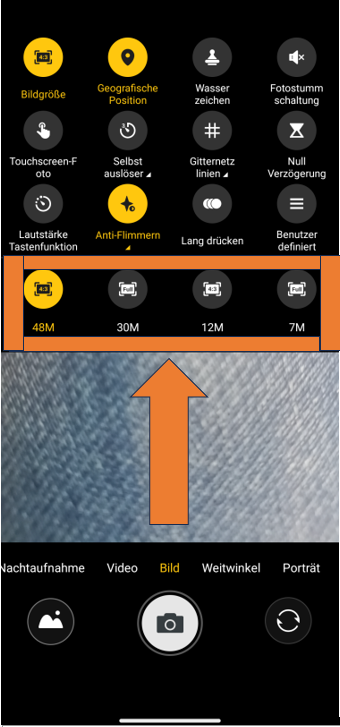 | 4. Select your setting . . | 4. Select your setting. |
| The more megapixels (M) are selected, the higher the resolution of the image. The image file is therefore larger and requires more storage space. The Android version does not determine how many megapixels can be recorded, this depends on the device. | ||

In addition, you have the possibility to set different modes on your camera to adjust the recording to your needs.
Android 13 | ||
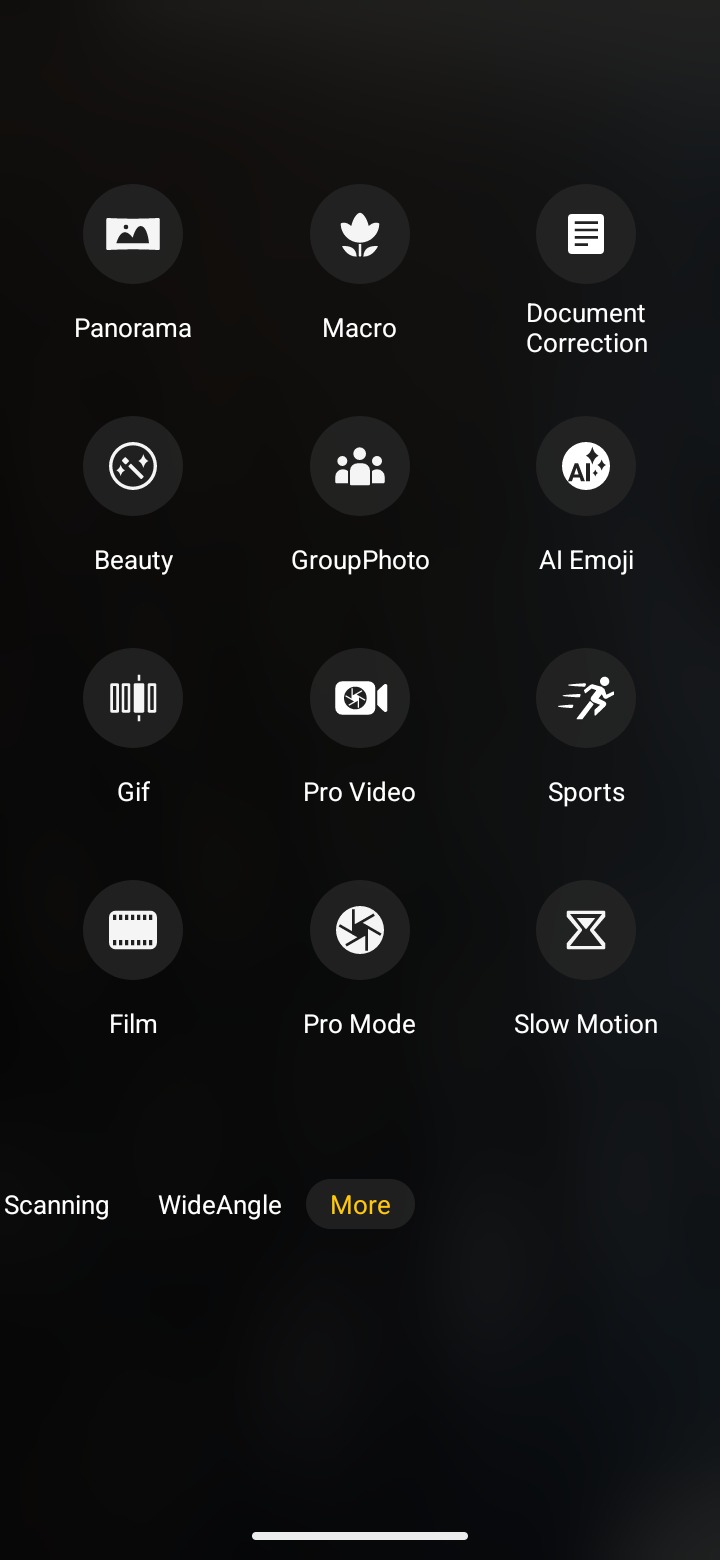
| 1. Open the camera app. | 2. Swipe down on the bottom bar to "More".  | 3. Available modes:  |
Android 14 | ||
1. Open the camera app. | 2. Swipe down on the bottom bar to ,,More".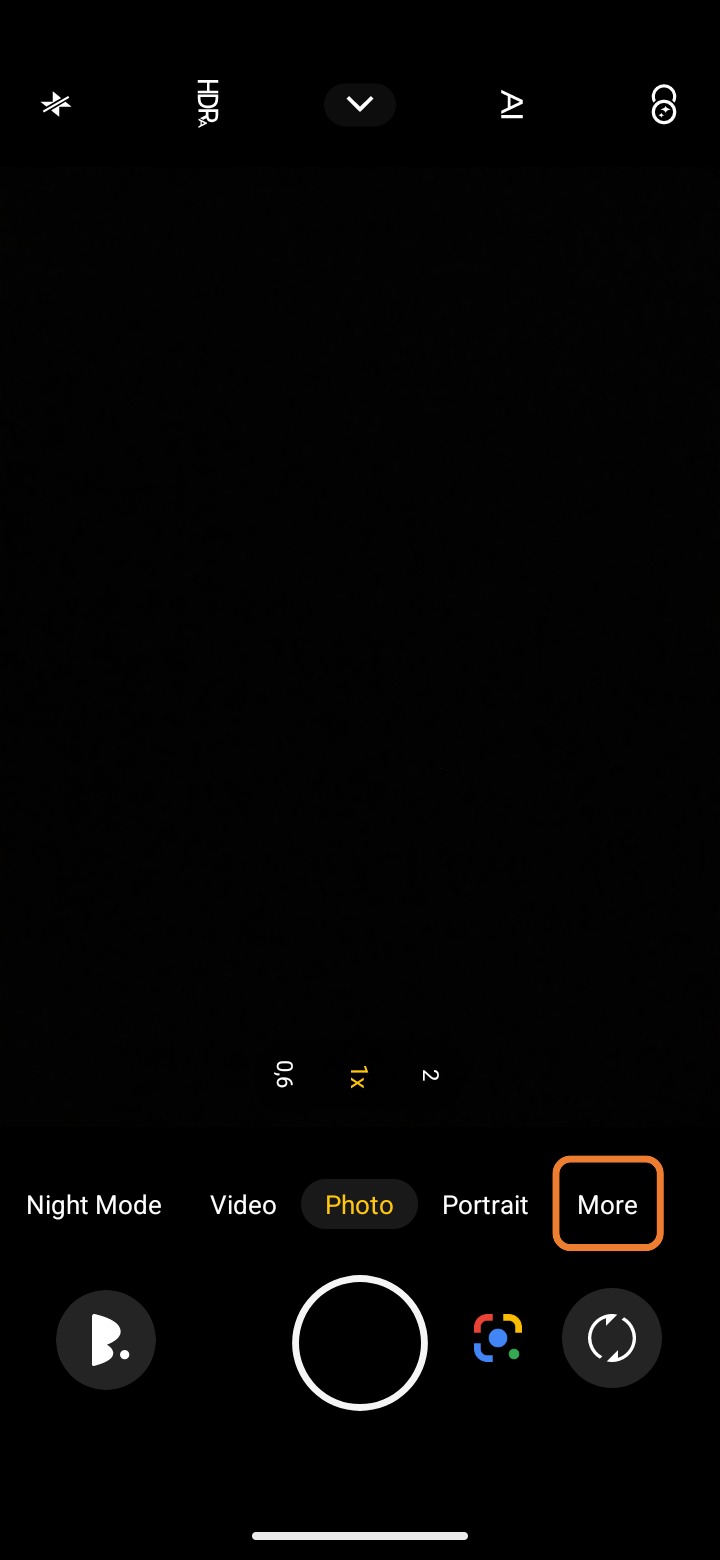 | 3. Available modes:
|
Android 15 | ||
1. Open the camera app. | 2. Swipe down on the bottom bar to ,,More". | 3. Available modes:  |
Explanation of the different modes:
Picture:
Through the picture mode, you have the possibility to record and save a point in time.
Video:
Through the video mode you have the possibility to record and save a time period.
Night Shot:
With the help of the night shot mode, you can take photos even in low ambient light. The recording may take a few seconds longer.
Wide Angle:
Wide angle means that the camera has a large angle of view, as a result, the camera captures a larger section of the image. This mode is advantageous if you want to take a picture of a landscape, for example.
Portrait:
In portrait mode, a depth-of-field effect is created by the camera. Portrait mode allows you to take photos where the focus is on the subject. The background remains out of focus.
Professional mode/Pro Mode:
Within the professional mode, you can customize many photo parameters. Such as the white balance or the ISO value.
Panorama:
In panorama mode, a scene is photographed section by section. Finally, the shots are combined to ultimately create a wide and seamless photo.
GIF:
Using the GIFs mode, you can easily create gifs via the camera app.
Explanation GIF: GIF stands for Graphics Interchange Format and is a special form of graphics. Often, a GIF file is an animated image.
Slow Motion:
When recording video in slow motion mode, the video is played back at a greatly slowed down speed.
Timelapse:
When a video is recorded in timelapse mode, the video plays back at a greatly accelerated speed.
Code Scanner:
Within your Gigaset camera app, you can scan QR codes while using the Code Scanner.
Explanation QR code: The QR code is the two-dimensional version of the barcode. A wide range of information can be transferred quickly via the QR code scan.
Macro:
When using Macro mode, the object being viewed can be photographed from a closer distance without being blurred.
Beauty:
When using the Beautify mode, you have the possibility to use effects that are supposed to beautify the captured face. This includes effects such as "skin beautification" or "facelift".
Document Correction:
The camera scans documents, automatically adjusts them (e.g. in the event of distortion) and optimizes the lighting to make the text clear and easy to read. Ideal for scanning texts, invoices or notes.
Group Photo:
The group photo function automatically ensures that everyone in the picture looks good, even if they are moving. The camera optimizes the shots so that everyone is clearly visible in the photo.
AI Emoji:
Users can add a customized face filter or frame to the face, which they can choose as they wish.
Pro Video:
The feature gives the user more control when recording videos. You can manually adjust settings such as exposure, focus or ISO to record videos in higher quality and according to your own preferences.
Sports:
This function is designed to better capture fast movements. It helps to reduce motion blur and ensures that action shots, such as those taken during sporting events or fast movements, remain clear and sharp.
Film:
Videos can be recorded that have a professional, cinematic look by applying various filters.
What is Google Lens?
Google Lens is an intelligent image search technology that allows you to scan images and find out more about the objects, text or scenes in them. For example, you can use Google Lens to recognize plants, find products, copy text in images or even scan QR codes.
Google Lens (from Android 14/15):
Android 14/15 | ||
| 1. Open the camera app. | 2. Click on the highlighted icon. | 3. Point the camera at an object, text or scene that you want to analyze. |
4. Google Lens will automatically recognize the area and show you information or options.  | ||
Was this article helpful?
That’s Great!
Thank you for your feedback
Sorry! We couldn't be helpful
Thank you for your feedback
Feedback sent
We appreciate your effort and will try to fix the article